I got my ignition coils on Monday, which was MLK day and I was off work, so I installed them, changed the oil, and fired her back up. Enjoy some ear candy.
Grace is running quite good now but I'm a bit concerned about the amount of smoke and it's bluish hue... Seeing that I had the heads rebuilt and the valve seals are new, it's not likely that the oil is coming from the top end. When I had the engine torn down one of the cylinder bores had a lot of taper, so I'm suspecting that the oil is coming past the rings on that cylinder. If that's the case, at least there are a lot of Explorer engines out there in wrecking yards!
Beyond that, I didn't do much on the Falcon project. But seeing that I was off work and the wife and little man were in California, I took the chance to celebrate MLK day the way I'm sure Dr. King would have if he had seen racial equality in his lifetime. I built myself a welding table.
That's all for now. In the meantime stay fresh, cheese bags.
First things first, Grace is back! There is a lot of tuning to be done, but as you can see she fired right up on the first try.
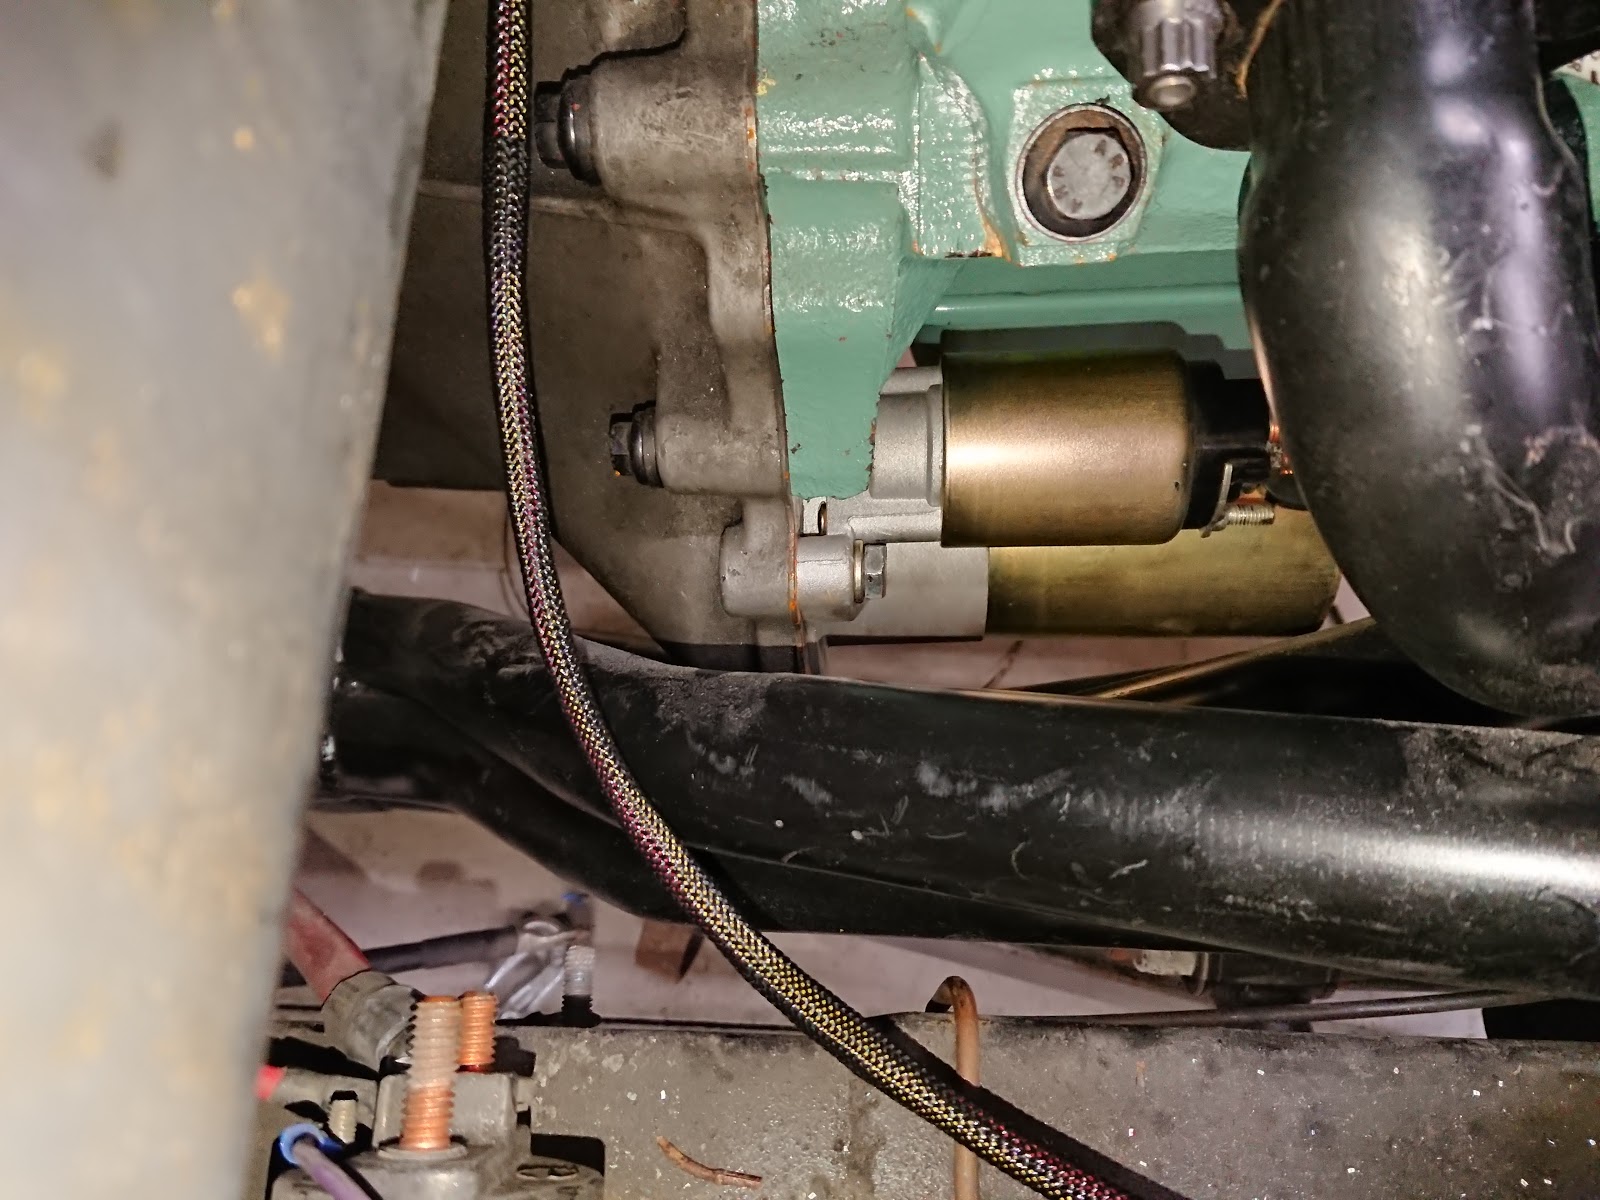
After completing the wiring harness there were a lot of small odds and ends to complete. I guess I had never re-installed the starter after fitting the engine, so I was pretty surprised when I went to put it in and there was no way it would fit. The starter had three mounting tabs, but only two are used in this application and the extra tab was interfering with the headers. So off it came.
After I cut the tab off, it became very clear that it was not the only part of the starter that interfered with the headers. Since these headers are for a 94-95 mustang, I looked it up and sure enough, it was a different starter design. My old starter was for a Ranger, as well as Fox body Mustang. I got on amazon and found a deeply discounted open box starter, and placed the order.
Now that the starter was in place, I could make cables for the starter. Thankfully had enough cable and lugs leftover from previous projects that I could get right to it. Out came the hydraulic lug crimper and before long I had fully complete and fully sealed starter and alternator charging cables.
Spark plug wires were another custom part I had to make. I had in my head that I needed vintage-look braided spark plug wires. They can be kind of hard to cone by, and eventually I found a company that made just what I needed at a much better price than any competitors. They made a small error on my order, but I called them up the next day and they fixed it right away. I highly recommend The Brillman Company if you are looking for vintage style wiring or spark plug wires.
The kit I ordered needed some modification because my application is a little bit odd, but were used to that sort of thing by now. It just took an hour of cutting, crimping, and wrestling plug boots into place with the help of some dielectric grease.
The last of my items to build was a throttle cable and bracket. I've found that bike brake and shifter cables work well as throttle cables and are cheap, so I don't even bother looking at the Summit or Jegs site when building one. The bracket was fairly simple, just a piece of drilled rod and angle iron welded together.
Before I started her up, there were a few other small things to do, like fuel drain, radiator install, oil and coolant fill. Those all went pretty quickly and happily, startup was pretty easy. It felt really good to get the engine going on the first try.
However, over the past week since the first start I've become aware of a few issues. First was a minor issue, the valve covers were leaking. The valve covers and the gaskets were just not playing nice together. After getting the engine up to operating temperature, I noticed that the paint had burned off the headers (this was expected) on all but 2 of the cylinders (this was not expected).
Cylinders #2 and #8 still had bright shiny paint, which meant that they never got hot. It might seem strange that 2 cylinders would have this problem, until you realize that cylinders #2 and #8 are paired together in the ignition system. My ECU can have up to 6 ignition outputs, which isnt enough to have one output per cylinder, so I paired cylinders that were opposite in the firing order. A setup like this is called waste spark because the spark plug fires on the compression stroke and exhaust stroke.The exhaust spark is "wasted". The only drawback is that it may limit your RPM (I think this won't allow me to run faster than 10,000 rpm or so) and the coils fire twice as often, so the coil and plug life could theoretically be reduced.
Anyway, once I figured out that the problem was related to this spark output, I took a look at the ECU. I quickly realized that while I was soldering on the ECU board, I had forgotten to build a transistor circuit to trigger these coils. I got the soldering iron out, along with the resistors and transistors I keep on hand for occasions like this. Everybody does, right? Unfortunately, a now-functional coil trigger circuit was not the cure for all my problems. Apparently my goof with the transistor circuit fried my coils. I am able to trigger other coils with this spark output, but coils #2 and #8 are unresponsive. I've got some Amazon cheapo coils on the way and we'll go from there when they arrive.
I have one factoid to share before I hit the "publish" button. Grace was without a running engine for 366 days this time. It was one year and one day from the time I pulled the ailing 4-banger to the time I started the V8. And even on just six cylinders, the V8 is far smoother than the four cylinder ever was. I'm feeling ok about this swap so far.
The last month has been a busy one for me and old Grace. Over the
holidays, I had a fair amount of time off, but Jen didn't, so I watched
Max a lot. It gave me a renewed appreciation for the toddler wrestling that she does on a daily basis.
Then when Max was asleep and I wasn't the toddler wrestling champion of the Great Lakes Region, I went out to the garage and got to work on the hoses and wiring harness.
The hoses were pretty straightforward as usual. I pulled out my old home made hose end installation tools (that saga can be read here) and made a few crimps and it was done. It might have taken a couple hours at a maximum.
Silicone fire sheath on a fuel hose
This fuel hose runs close to a header, I figured I should protect it.
The big job here was the wiring harness. That's always a big job, but as I've said before, I really kinda like it. You know that satisfaction some people get from wrapping Christmas presents? Yeah, I don't get that feeling from wrapping presents, but I do get it from making a neat, tidy wiring harness. Now I'm not making some multi-thousand dollar motorsports harness (though I'd love to learn to do that), I'm just making a well-organized wiring harness that will work in a street/performance environment and not give me any trouble.
Since my old harness for the 2.3 was pretty good, and a few things were staying the same, I pulled the old harness out and started stripping it down. Pretty quickly I had it separated into the re-use pile and the "don't throw out because it might come in handy at some point" pile.
Several months ago, I found a seller on eBay selling remnants of wiring harnesses from projects in their shop for 20 bucks. This was a fantastic deal. It allowed me to get about 40 six foot strands of wire, each in a unique color/stripe combination. From this bundle I pulled 8 injector wires, 8 coil wires, and a few other random wires.
There were also a number of power feed and ground wires which I had to add. For this, I bought a couple hundred foot rolls of TXL wire from Del City. I highly recommend them, as it was only about 5 dollars for each hundred foot roll of 22 gauge wire, and it seems to be good quality. Because so many devices needed power and ground, I ended up doing quite a few splice joints.
Another resource I came across while planning this harness was High Performance Academy. They provide courses on various automotive wiring, tuning, and ECU related topics. Most of their courses are paid, but I got lucky and the one on splicing was free!
I then laid all the wires out and bundled them together with zipties and blue tape, approximating their location in the engine bay. Rubber coated cloth friction tape then wrapped the harness in select locations to shape and protect the harness. Friction tape is nice, because unlike electrical tape, it doesn't leave any sticky goop on the harness. Sticky goop is not good times.
Sheathing came next. Once again, I relied primarily on expandable braided loom. One advantage I had over last time was that I had a better idea of where everything in the engine bay needed to go, so there are no zip-ties in the final harness.
Sourcing connectors and terminals is one of the more challenging aspects of wire harness building. It's fairly easy to find pigtails (connectors with pre-crimped terminals and a "pigtail" of wire), but to find un-crimped terminals can be a real challenge. Some of the sources I used and highly recommend are Corsa-Technic, Ron Francis Wiring, and Ballenger Motorsports.
The injector and coil connectors I sourced from random eBay sellers because they were cheap. This was a mistake. First off, when comparing connectors and terminals to the genuine articles from the above listed sellers, they don't have anywhere near the quality control. The connectors had parting lines from the molds, and just didn't seem to be anywhere near OEM quality. The terminals were hard to crimp consistently and didn't lock into place as securely as I would like. And I also found that I had been shorted a terminal in my coil connector kit. Thankfully when I ordered from Corsa-Technic, I had picked up several extra terminals of the same type that are used in the coil connectors. Going forward, I'll definitely use only reputable suppliers for connectors and terminals.
Another item I was turned on to by High Performance Academy was the solder shrink sleeve. My crank signal wire is a shielded wire, but I never knew how to properly connect the shield to ground. Now I know. The shielding strands are folded back on the outer casing of the shielded wire assembly and a solder shrink sleeve is slipped over it. The heat gun melts the solder, making a connection between the shielding and the green pigtail, and then the heat shrink keeps it all contained and protected. This is the one location in a wiring harness where solder should be used. Nowhere else.
This is the final product. One of the nights I was out in the garage, a friend was hanging out while I worked. He commented as I pulled the harness through the firewall and out of the engine bay to make some adjustments that it looked like I was pulling the nervous system out of an animal carcass. And I guess in a way, that was exactly what I was doing.
Harness complete, I turned my attention to re-configuring the ECU. The Megasquirt ECU, while it has it's shortcomings is pretty nice because of it's flexibility. It does take some know-how, but it really can do a lot in a very cheap package. Maybe someday I'll upgrade to something nicer, but for now it'll do just fine. Anyway, I spent an evening watching some bizzare Netflix show with Jen and my soldering iron. I think Jen was jealous.
And to top it all off, I then did more automotive yoga in the driver's side footwell to hook up the harness and make sure it wasn't going to self destruct due to vibration and sharp sheet metal edges. It's always a good time.
Thats it for fuel lines and wiring, but stay tuned...