Grace is an old girl with a lot of charm, and while her exterior is absolutely perfect, it's what's on the inside that counts, right? The time has finally come to do a little interior work. In my old age, I'm appreciating the finer things in life like cars that have door seals, and dash pads that haven't had cracks for longer than I've been alive.


I started by stripping out the whole interior, save for wiring and steering wheel. The condition of everything not made of metal is about what you'd expect of 58 year old items left to bake in the sun. The dash pad basically crumbled in my hand as I pulled it out.
 |
| This speaker is able to play The Beach Boys hits at the ideal volume for optimal car show enjoyment |

With the dash pad, windshield trim, dash trim, knobs, radio, glove box door all removed, I proceeded to the seats, carpet and seatbelts


Now that everything was put of the car, I could do the first step, which was to prep the floor pan for paint. I had been dreading this part of the literally for years. I hate paint prep, it's nasty tedious work and I was worried I'd be at it for hours on end. A few years ago, I did a little bit of work on the floorboards that confirmed this suspicion. Thankfully this time, I saw something online recommending Harbor Freight wire wheels for stripping away paint and crud so I figured I'd give it a shot. Harbor Freight delivered.

 |
| The "before" picture |

 |
| Have you heard? There is a shortage of N95 masks. Something about a virus? |
These fine wire wheels made the paint and rust removal go very quickly, I was pleasantly surprised. Previously I had only used DeWalt thick wire wheels, and while they were very durable, they didn't do the job nearly as well. At 4-5 dollars a piece, they are well worth the money. I must add a word of warning: ALWAYS WEAR PROTECTIVE EQUIPMENT. These wire wheels shed many wires at high speed. They'll stick in your clothes, occasionally your skin, and if you don't wear safety glasses, your eyes. I'm not the smartest man, but I ALWAYS wear safety glasses anytime I'm running an angle grinder. Eyes are cool, protect them.
The plan has always been to paint the floor pans with POR 15. POR 15 is an incredibly durable paint, but it requires a ton of very careful prep. If you don't follow the process, it's a terrible paint. I only wanted to do this once, so I decided that I should make sure everything on the floor pan was final. One thing that has bothered me for a long time was the front bucket seat mounts. When I first built them, I made them an inch too short, and later had to add in an extra inch of material.While this was functional they were sloppy, and I wanted to do them right. So out came the angle grinder, and I got to work.
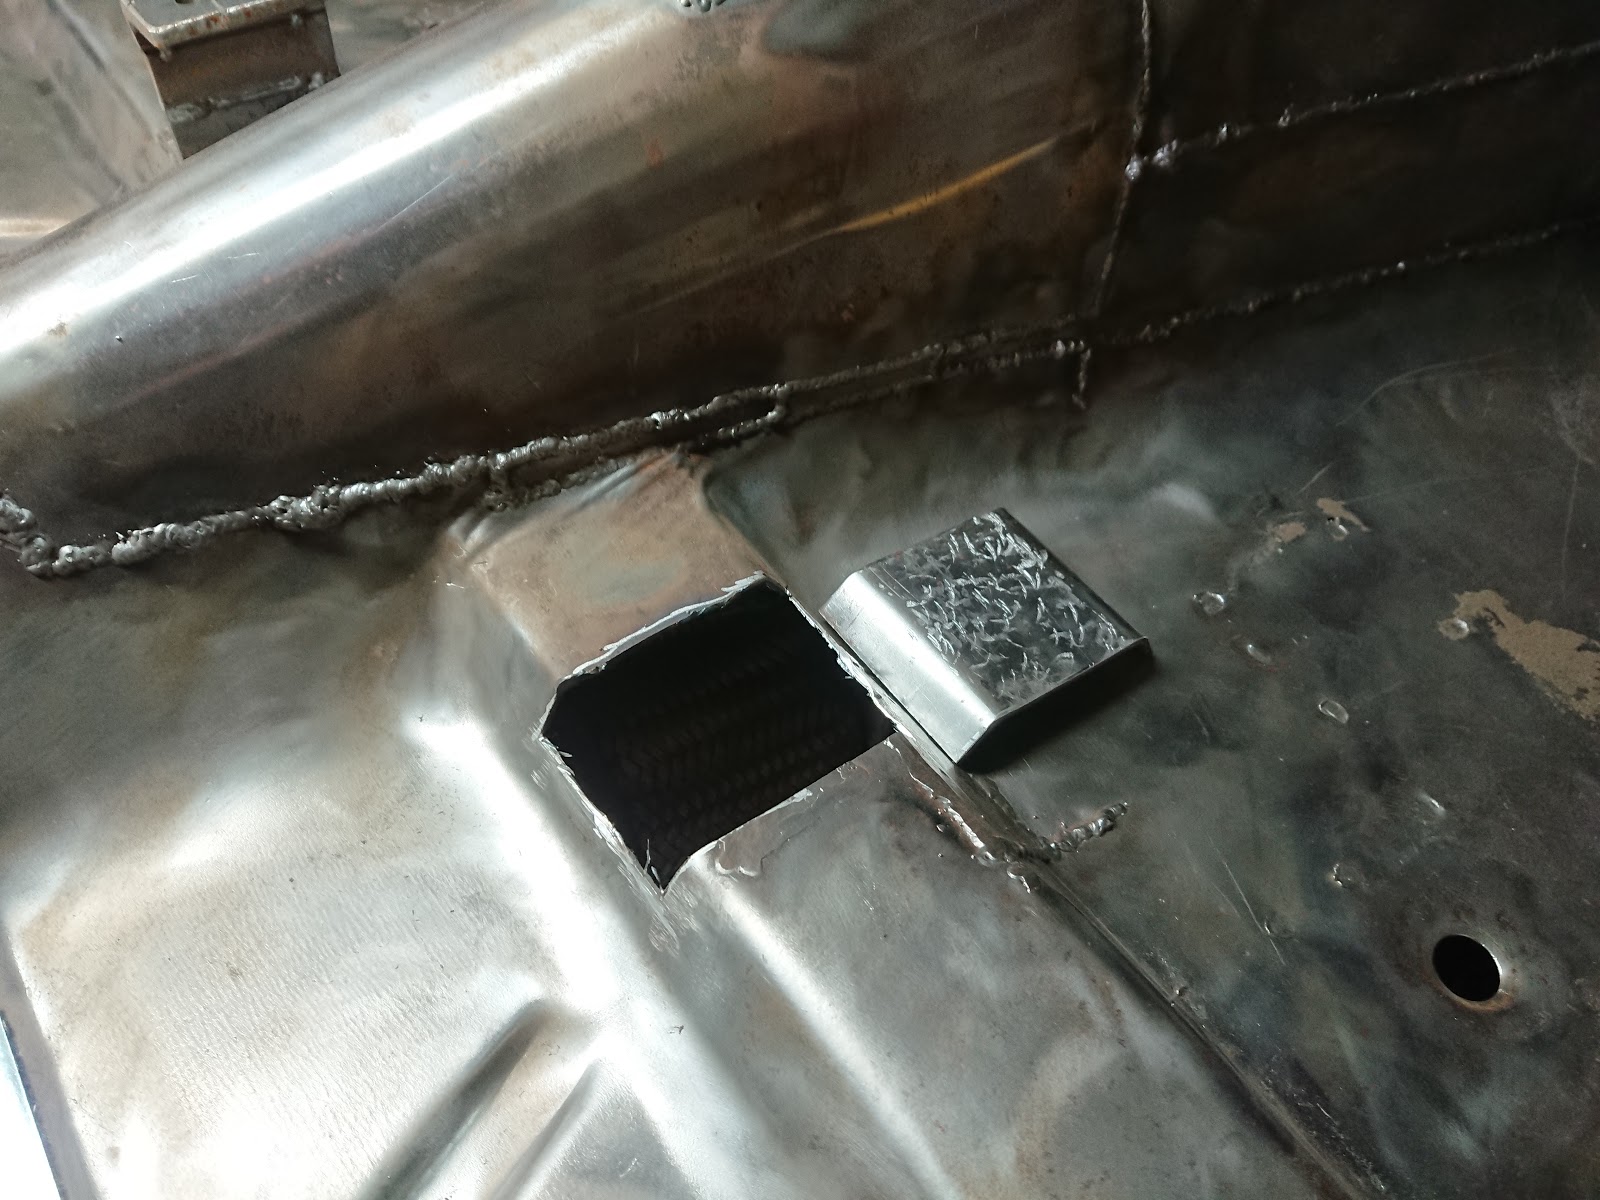 |
| Falcon sheet metal is not particularly thick nor rigid, so I welded new 1/8 steel seat mount supports |


 |
| Rule 1 of internet welding (or dating), only show your good side |
 |
| New on top vs old on bottom |
 |
| Floor pan fully wire brushed with new mounts welded in. |

This little detour took entirely too long. It was probably a month's worth of evenings a couple times per week. With the new (much more attractive) solid seat mounts welded in, I then went through the paint prep process. First, I vacuumed the remaining crud out of the floor pan, which was followed by blowing compressed air in all the nooks and crannies of the interior sheet metal. Repeat 7x. Then I used the POR 15 degreaser compound to scrub any remaining dust, dirt, grime, or vaporized seam sealer from the floor pan. I rinsed the pan. Immediately thereafter, I applied POR 15 Metal Prep. It's some combination of acid and zinc which etches and coats the metal. This has to stay damp for 20 minutes at least, and is then rinsed. Before applying paint, the metal must be bone dry. I waited two days and then brushed and rolled two coats of gray POR 15 to the pan.
 |
| It's supposed to look like this, I promise! |

 |
| Ahhh, much better |
I think it came out quite nicely. If my prep work did it's job, I should have an impermeable coating on the floor pan which won't rust, even if it somehow ends up constantly wet (as is often the case when a window seal leaks and soaks the carpet padding in an old car).
With this step finally complete, I was able to apply some sound dampener tiles to my floor. This is a product known to generically as "Dynamat" or sound deadener, and it is almost always used incorrectly. Most users assume that this material blocks noise from entering the vehicle. In reality it is simply to keep body panels from resonating and amplifying structure-borne vibrations. The engine, tires, exhaust, transmission, or even fuel pump can cause this vibration and if it matches with the natural frequency of a body panel, it will amplify the sound. When these tiles are applied, the butyl rubber on the back absorbs these vibrations and turns them into the tiniest bit of heat. The aluminum foil on the face protects the butyl and keeps it from sticking to everything it comes in contact with. The flat areas of the body structure get about 25-30% coverage with this material, any more than this is a bit of a waste as it typically doesn't further improve vibration damping performance.
I had purchased damper material from Sound Deadener Showdown four or more years ago, with high hopes of using it soon. Better late than never I suppose. Sound Deadener Showdown has since shut down operations unfortunately as the operator of the site has retired. It is however still a fantastic resource for anyone looking to improve the noise level of their car interior.

 |
| Thick aluminum foil on top, butyl rubber on bottom |

Will I do more? Or is this enough. There's only one way to know!