Life has been rather busy and I've neglected you, dear reader. I'm sorry. Please accept this blog post as a gift of sorriness. I haven't had time to work on Grace in quite a while either, so this post is looking back a few weeks.
I thought it might be a good time to put a partial exhaust system on the car so that I didn't get smoked out every time I start the car, and to quiet it down a little bit so that the mechanic doesn't get in trouble again. I used
Columbia River Mandrel Bends for my exhaust tubing, and Summit Racing for my flex coupling and resonator. The plan was to make an exhaust system that terminates in front of the rear axle for the time being, and later add a muffler and tailpipes at the rear of the vehicle.
One challenge I've always had when trying to cut tubing, especially bent tubing, is that I fail to cut the tubing perpendicular to the tubing centerline radius. This time I decided to try something new. I wrapped a wire around the tubing and twisted it until it was tight and then marked it with a sharpie. It didn't produce perfect results, but it was generally better than other methods I've tried.
The exhaust system works for now, but I can't say that I'm thrilled with the fitment. I will have to do a major overhaul once the more important things are worked out.
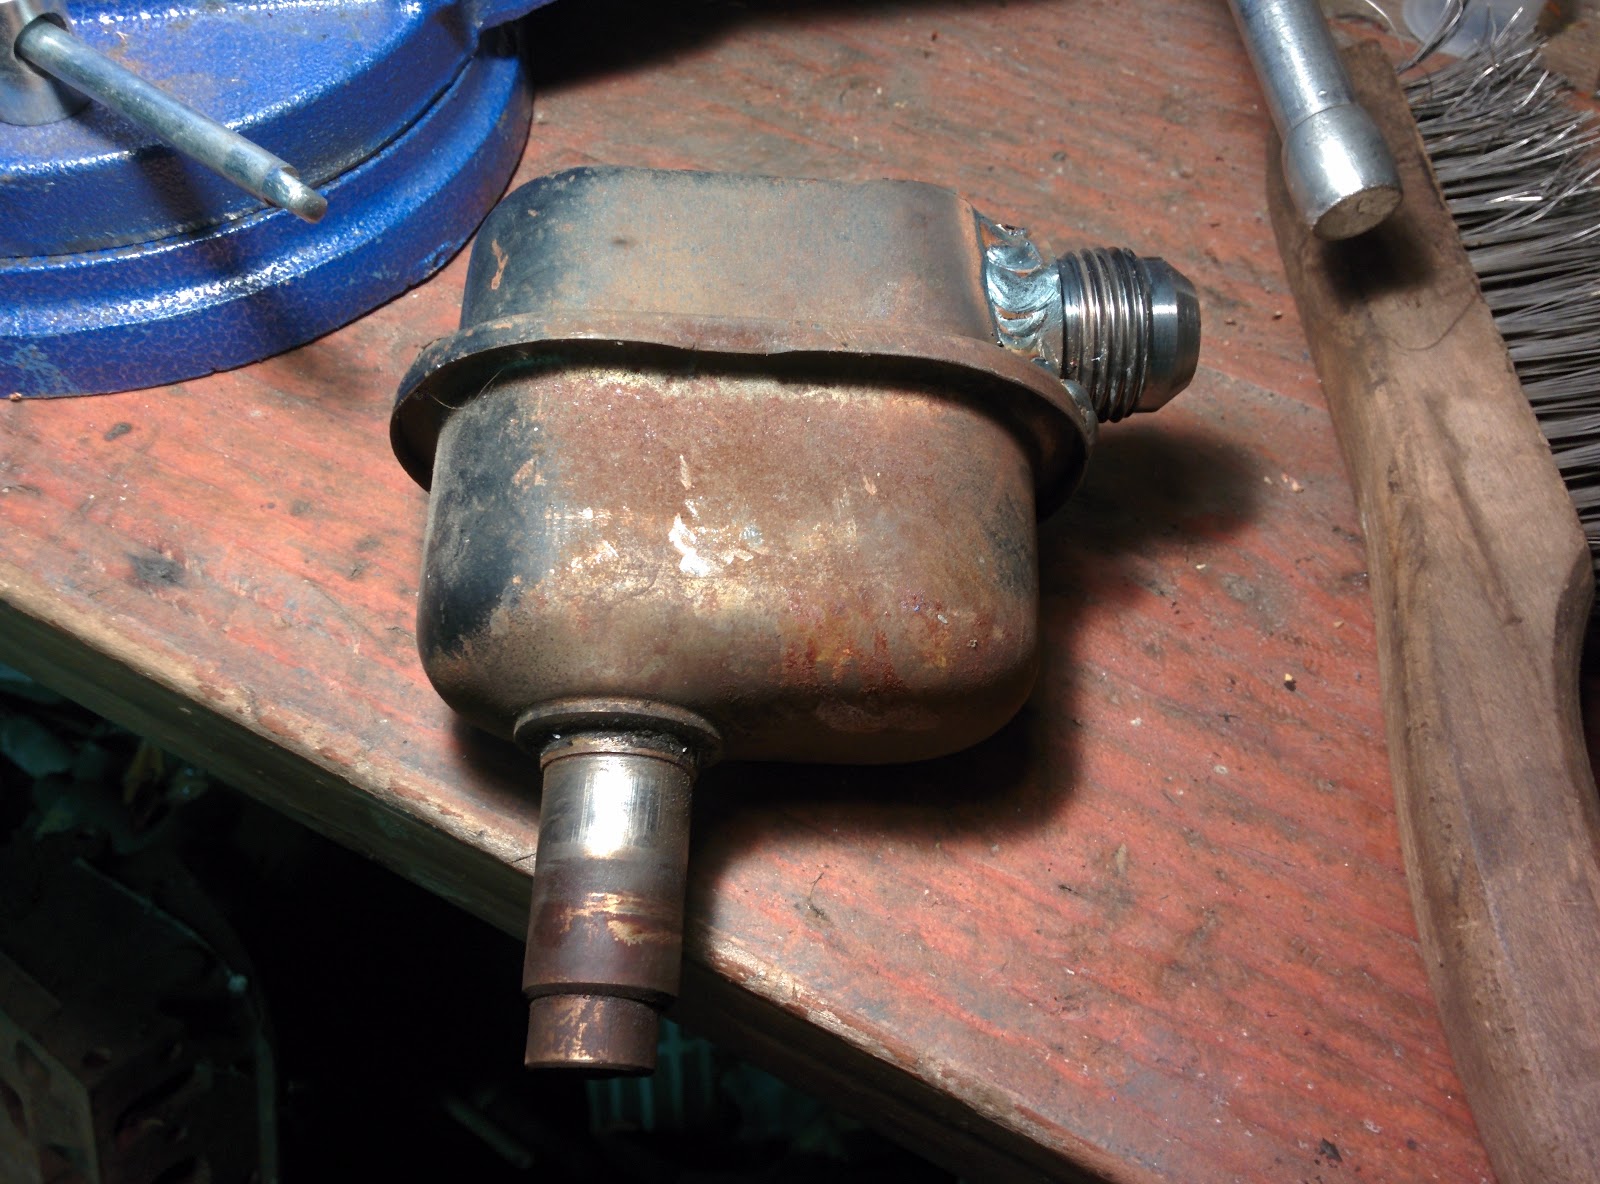
The second time I took Grace around the block, I let her get into the boost a little bit. Like a new puppy, she was eager to play, but also like a new puppy, she peed all over. I did not have a functioning PCV system at the time and so crankcase blowby came rushing out the block breather with a healthy portion of oil. When I had this engine in the Ranger, I used a catch can to capture any oil that escaped the crankcase as well as vent excess crankcase pressure. I wanted to clean up the installation of the catch can a bit compared to how it was in the ranger, so I spent a few extra dollars on AN fittings and bungs for the system.
 |
| Modified turbo engine block breather |
 |
| Valve cover breather bung |
 |
| Original (non-turbo) block breather installed |
 |
| Left: modified turbo block breather Right: stock non-turbo block breather |
 |
| Modified turbo block breather installed |
 |
| Breather lines installed |
 |
| JESSE HAVE YOU BEEN SMOKING THE MARIJUANAS? |
 |
| Catch can installed |
After installing the catch can, I took grace around the block and let her boost to her heart's content and did not notice any oil loss due to the boost. Unfortunately that doesn't mean that there aren't any leaks at all, since 2/3 of my vehicles feel a need to mark their territory. This morning while working at 3 AM (I'm in Arizona for vehicle testing and it's too hot to test during the day) my coworker Dwayne told me to try Loctite 574. Apparently it is a crankcase sealer developed by Porsche, which was just recently made public. At $18 an ounce, it had better work miracles.
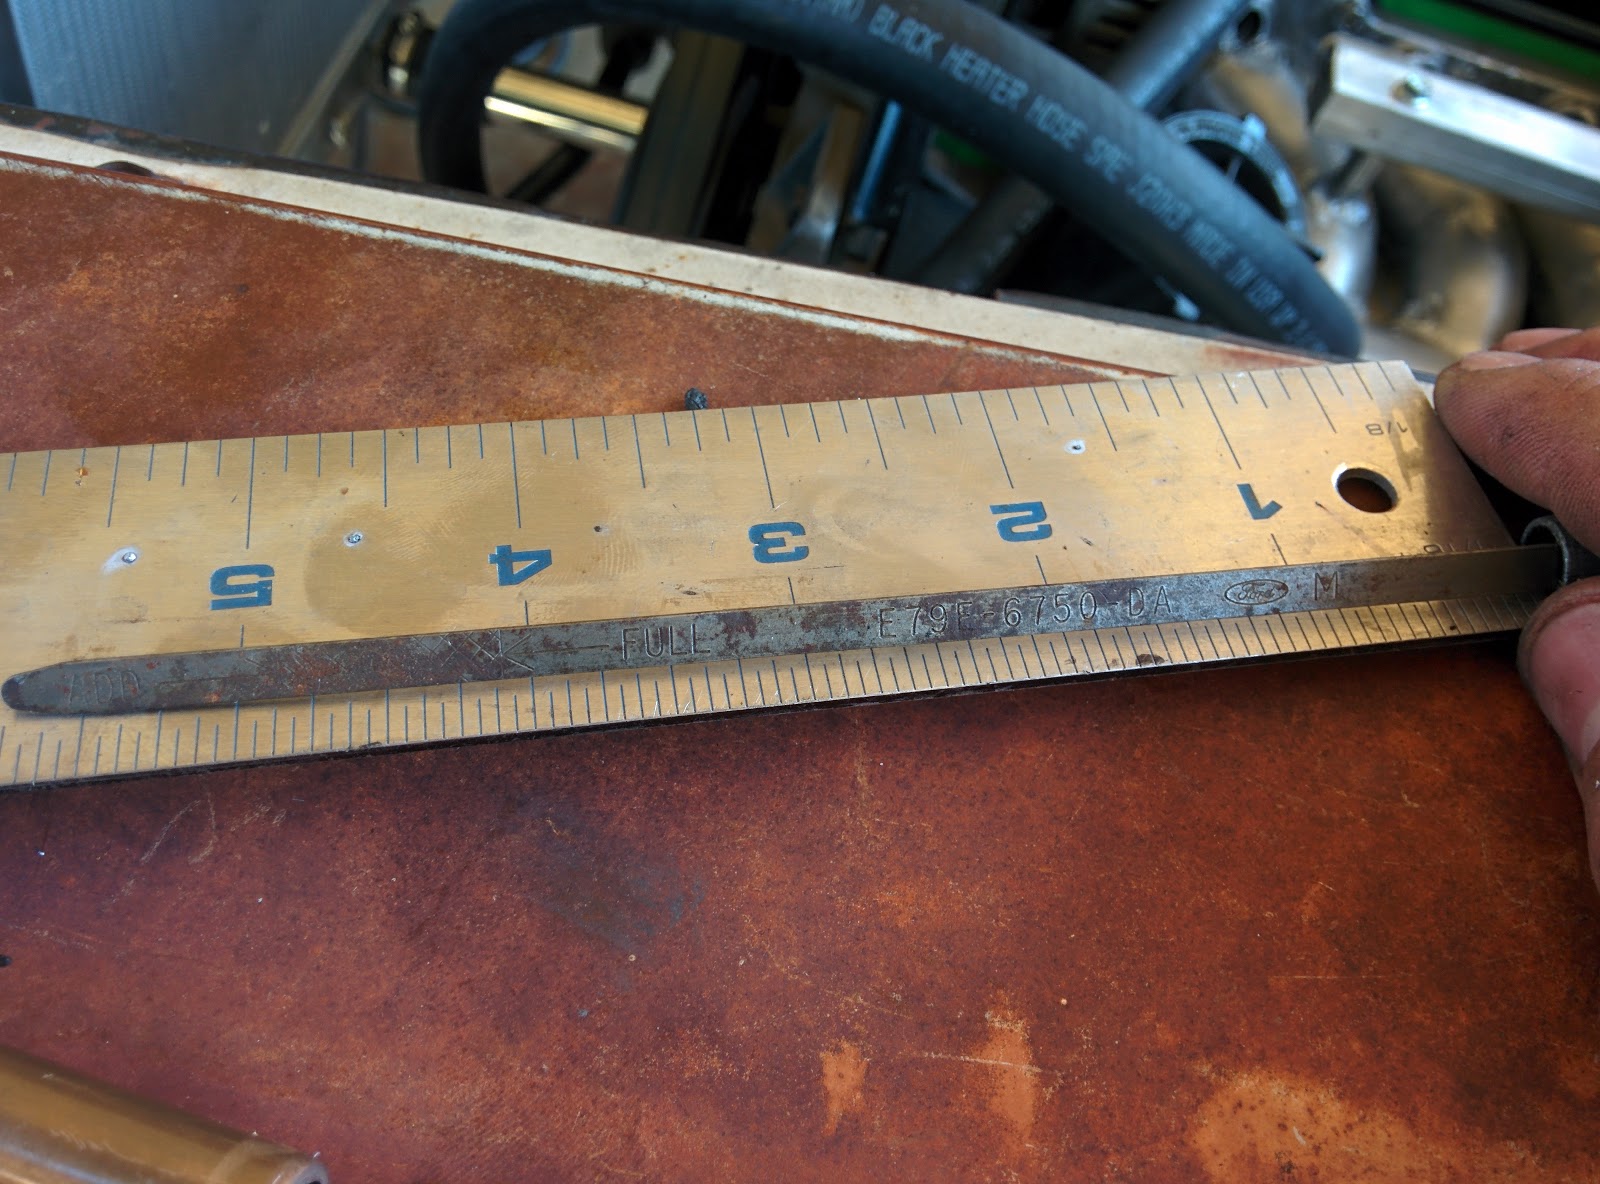
Dipstick tubes are not a car part that occupy my mind very often, and I've never seen anyone write about how they made a dipstick. (sidenote: dipstick is a funny word) But over the past couple weeks I thought about how I would make a new dipstick tube since it was very obvious to me that the old one would not work. As it turns out, I should not have spent so much time worrying about how I would fabricate a dipstick tube and just gone outside and made one. I noticed that my 3/8 fuel hardline was similar in size to my old dipstick tube. I tested the fit on the spare engine block that resides under my carport and so my surprise, it fit snugly but perfectly. I then bent the tube to fit around the intake manifold, trimmed and marked the dipstick, and welded a threaded boss onto the 4th intake runner to hold the tube into place. The whole process was very painless and I was thrilled with the results.
 |
| Left: original dipstick tube Right: new dipstick tube |
 |
| measurements from the original dipstick |
 |
| trimmed dipstick |
 |
| Current state of my engine bay |
There were two other small issues I found. First, power steering was not functional and actually began to leak. After closer inspection, I found that I had installed my power steering flow valve backwards and I had a damaged O-ring on one of the fittings. Second, unsurprisingly, I found that my intake manifold flange was severely warped from all the welding I had done. I will need to remove the manifold and have it machined, but in the meantime, I made a ring of RTV around all the ports and installed it.
 |
Ford power steering flow valve. If it pops out, don't just
put it back in and say "it'll probably be fine". |
 |
| Damaged O-ring |
 |
| quick'n'dirty |
OK dear reader, now that you've made it this far I think it's time for full disclosure. The real reason I haven't posted in a couple weeks is because we cancelled our Verizon internet and were waiting for the Time Warner Cable to be installed... wait no, that wasn't it... Oh yeah! I got engaged. I guess that means Grace will have mom, though I'm pretty sure her parents won't love her equally. But yeah, I've been a little busy with that, and with work. In a week or two I should be able to pick up the wrenches again. In the meantime, party on.
 |
| With Jen in Sequoia National Park, where I gave her the precious |
Edit: this is my 50th post. Woohoo! I also just eclipsed 40k views, which probably isn't that much, but it feels cool. I also wouldn't mind if you subscribed to the blog.


Now you're a family of 3, it's adorable.
ReplyDeleteI just love this project. Thanks for helping me avoid the dishes!
ReplyDeleteThat is a clean dipstick, and I'm glad Jen got "the precious."
ReplyDeleteI have found that this site is very informative, interesting and very well written. keep up the nice high quality writing. California Black Plates
ReplyDelete