Welcome back, dear reader. No doubt, you've been on the edge of your seat since my last post where I cryptically told you I had gone green. Well, it's true.You gotta reduce, reuse, recycle. I am reducing my carbon footprint by buying another junkyard engine from little Zachery's 1998 Ford Explorer. You remember little Zachery, Frank and Barb's boy... the one floating through life collecting misdemeanor charges and buying booze for high school kids. After the divorce, when barb took the Eddie Bauer Explorer, Frank was out of a vehicle for a while. Not that it mattered all that much anyway since Frank lived on a boat and didn't have a license because of the DUI. But eventually Frank picked up an XLT trim level Explorer with a big dent in the side. The original owner had put it into the guardrails on an onramp when the right rear firestone tire blew. Frank got a loan at the seedy dealership over off highway 19, and somehow paid it off without a visit from the dealer's in-house repo guy. And when Frank finally had enough credit to get a loan for his yellow convertible Corvette (who cares if you have a comb-over when it's blowing in the wind??) he handed the Explorer over to 19 year old Zachery. Amazingly, Zachery actually kept oil in the engine, but while he was in county for posession of controlled substances the Explorer got towed and eventually ended up being designated abandoned property. Since the interior smelt of cat piss and marijuana smoke it got sent to the wrecking yard. I hate to say it, mister small block Ford, you were probably better off in Zachery's hands.
So with a lead in like that, you'd naturally assume that we're going to talk about how I'm building this engine up for the Falcon. While that's a good guess, you'd be wrong. We're going to talk about Drive By Wire or Electronic Throttle Body systems.
Turn the clock back to 2020. I know that feels like a lifetime away, back before we all had the pleasure of knowing the name of Anthony Fauci, but way back then I had just installed the 5.oh into Grace and got a chance to try out the new intake. I always knew this intake would be overkill. Eight 52mm throttles are absolutely not necessary for a 300-ish HP engine, but we don't always do things because they make sense. After driving it, it was confirmed that the intake was a major mismatch with touchy driving characteristics. I looked at different ways to mechanically tune the progressivity of the accel pedal, but eventually came to the conclusion that conversion to drive by wire was probably the ideal solution. Not only can you control the relationship of accel pedal to throttle opening, this relationship can also be a function of engine speed, allowing you to shape your torque curve at every pedal position. You can also limit throttle opening when over-temp, or on loss of oil pressure, or implement an automatic rev-matching strategy for up- and down-shifts.
Drive by wire on Individual Throttle Body intakes like mine do exist, but they are pretty rare. They tend to fall into one of two camps: either very professional motorsports teams who spend a lot of money or low dollar tinkerers in their sheds. I knew that I was going to have to figure out a lot of this implementation on my own.
Currently Grace's engine control unit is a Megasquirt II. It's pretty flexible and capable, but it's also quite old. Megasquirt does not provide any support for drive by wire. There is a standalone drive by wire controller which can be used with Megasquirt, but it was about $500, and at that price point you are already halfway to a full ECU with DBW support. For a while I messed with making my own arduino powered DBW controller, but it was proving to be a lot of work and outside my pay grade. Somewhere along the line I stumbled across RusEFI, an open source ECU project that supports DBW.
Behold, the Frankenso
"FIRE EXTINGUISHER REQUIRED"
Powered by STM32 Discovery Board
Drive By Wire add-on board
Powered Up
DBW add-on installed, jumper wire spaghetti on the back.
I purchased the Frankenso (Frankenstein in a Denso form factor) back in May 2020. I began playing with it, and making errors right away. It seems I have to learn things the hard way. I fried a Discovery board along the way, as well as several other components in the power supply when I set the exposed circuit board on a metal surface while powered up. I am not a smart man. Thankfully there are generous people in the RusEFI community, and they helped me get it back up and functioning. It took much longer than it should have, but eventually in September 2021 I got a proof of concept up and running using the Frankenso ECU, an LS3 throttle body, and a BRZ accel pedal.
Once I had proved that I could indeed use this ECU drive a throttle body, I started modifying the throttle body housing so that it could be used in my application. To do this, I built a high precision particle board milling machine out of scrap wood and a $25 harbor freight router.
Step 1: stick the throttle body in a vise
Step 2: hack it in half
Enter the high precision milling machine
Step 3: Commence milling process
Step 4: remove a lot of material
Step 5: put it back together. Now you have a geared DC motor with redundant position sensors and a 10mm output shaft.
After I finished this modification I was quite pleased with myself. So pleased in fact that I did almost nothing on the project for months. In the meantime, I got a 3d printer and started to realize all the use cases. Most of the time I won't use it for a finished product, but as a rapid prototyping machine, it works quite well. I needed to make an adapter plate to mount this motor to the intake. I was sure that if I just tried to measure drill mounting holes, it would not fit well. At some point I realized I could have parts laser cut, but first I needed to validate my design. It became an iterative process: I measured the best I could, designed it in CAD, printed it in plastic, checked the fit, and went back to CAD.
Plastic Prototyping
CAD screenshot of the motor bracket
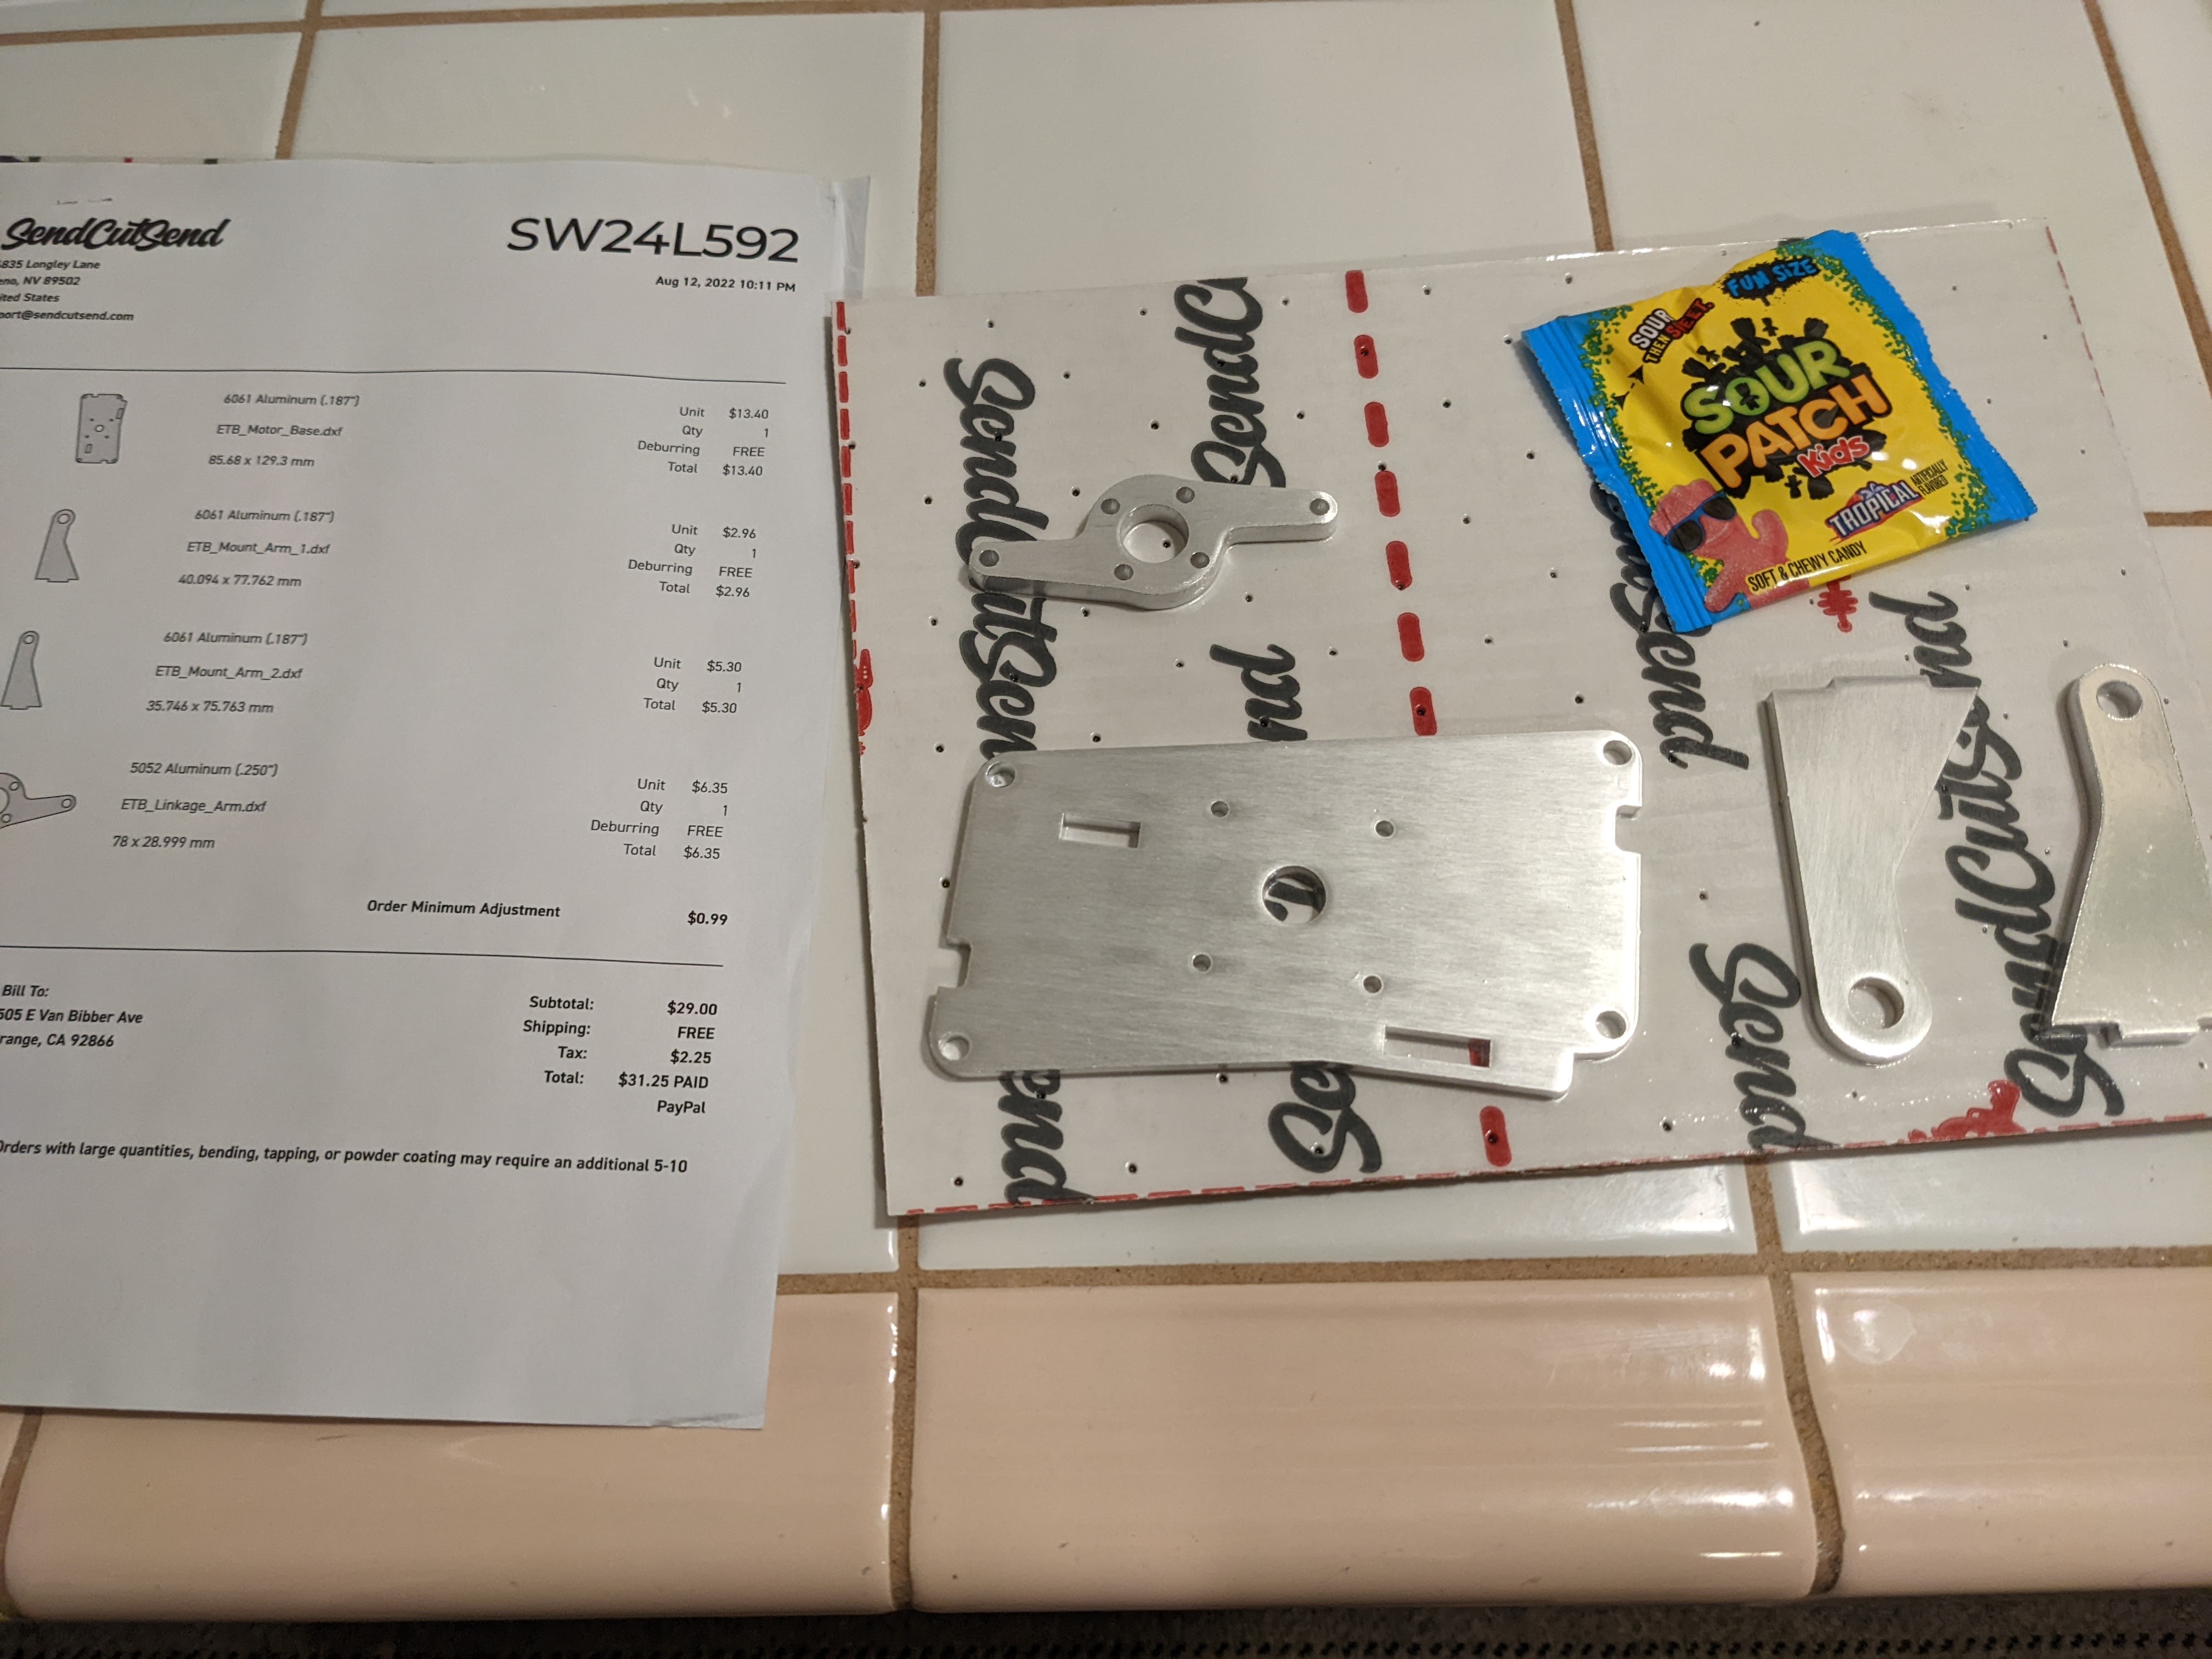
Eventually, I got something I was reasonably confident in and sent it to SendCutSend for production. This is a company that will take your CAD files, provide an instant online quote, produce and send parts to you, all for a reasonable price. I had four moderately complex parts cut out of aluminum all for $30. On top of that, they included a little pack of Sour Patch kids. That's what you call 5 star service.
Next I welded this bracket up, tapped a few holes, and put it together. It was looking absolutely mint, other than a few boogery welds. If there's one thing I've learned as a dad, it's that you can't be too afraid of a few boogers. Turds on the loose, now that's a different story (for a different time).
The lower bearing support was a 7 dollar robotics part.
The good welds which will of course, be on the underside of the bracket
Top side boogers
ETB motor in place
The test rig
Getting the throttle motor to actuate the throttle valves took a bit of monkeying around in the ECU settings but eventually I got it. I produced a proof of concept for a drive by wire ITB intake, and it only took like a year and a half! The throttle return springs are a bit strong for the motor, so it can only get to about 70% open. This should be remedied by reducing the preload on the springs, which I'll be testing shortly. I'll keep chipping away at this project an hour or two a night, a couple times a week, and dear reader, you can come along for the ride.
UPDATE: I made a short video to clarify exactly how this setup works. Maybe it will be of value to you.
Let's start this off right for my fellow Americans and remember the reason for the season:
It's not about celebrating the government, the military industrial complex, voting, the liberal world order, american exceptionalism, proxy wars, bacon, cheap gas, the CIA, illegal fireworks, legal fireworks, baseball, hot dogs, school teachers, flipping off the british royal family, V8s, cold beer, the police, monster trucks, or even apple pie. It's about the right to self determination, and often in ways that make state officials nervous.
Now, as you may recall from my previous blog post (a mere half a year ago) I made a mountain balance bike for my boy. He has enjoyed it and used it well, but recently it became apparent despite his protests that he was ready for pedals. (Yep, it's another bike post)
The original McDurdle
I had built this bike with the conversion to a pedal bike in mind. This is why I went to the extra trouble (and it was a lot of trouble) of re-lacing the rim to a hub with provision for a freewheel sprocket. In order to convert the bike to a pedal bike, I needed to weld in a bottom bracket shell. The bottom bracket is where the crankset (axle, crank arms, sprocket) mounts. Before I could do that, I needed to cut away some material in the frame to make room for the bottom bracket shell. Lacking precision machining equipment (don't let my angle grinder hear that) I needed to get a little creative if I wanted the bottom bracket to go in perpendicular to the other frame tubes. Cue the 3D printer.
Pilot hole drill jig
Bottom Bracket holding jig
In the flesh
I planned to cut the material out of the frame using a hole saw roughly the same size as the bottom bracket shell, but if you've ever used a hole saw, you are probably thinking I'm insane. Everybody knows hole saws were invented by the prince of darkness, Satan himself, as a way to injure tradesmen. If everything isn't perfectly square when using a hole saw, a tooth will catch and twist the user's arms into a pretzel, or smack them in the head with the drill, in the case of overhead use. I've come to learn however, that hole saws can indeed be used to cut all sorts of irregular work pieces, so long as the workpiece and the hole saw are held rigidly in relation to one another. An example of this would be a milling machine, lathe, or even a tube notcher being used to notch tubes for a roll cage. In my case, I figured if I could drill a pilot hole squarely through the frame, I could then use that pilot hole to guide the hole saw and keep it relatively ridgidly aligned with the frame. That's a word salad that is better explained by the pictures below:
Jig clamped in place with a drill bit inserted
Holes drilled, pilot rod in place
Hole saw with pilot rod in place
Cut in progress
Finished cut
Fine tuning the cut to fit the BB shell
As you can see, the cut came out decent. I did need to modify it slightly with a die grinder but it was much better than if I had free-handed it with my angle grinder. Satan still got his laughs in though, at one point during the cut a tooth caught and twisted my arm around so quickly that I sprained my wrist. Nothing too serious, but I did miss my weekly mountain bike ride because of it.
Now it was the other jig's time to shine. I pressed the BB shell firmly into the jig and mounted it up. With everything held securely in place it only took a few minutes of welding, and this was now a pedal bike. Or was it?
Even before I had welded the BB shell in, I could tell that there would be a clearance issue with the chainring and the chainstay. This is not an uncommon problem in mountain bikes, and there are many ways of making clearance. I went with a simple notch, which I then patched with a scrap of steel. There's not a lot of clearance, but it works.
And with that, the drivetrain went on. Unfortunately the chain rubs slightly on the seat stay, so that will require some correction. All in all, it works pretty well though, and I was pleased that it only took one night minus the jig design and printing.
Best of all, the next morning I showed the kid and despite not being that confident that he could ride a bike, he picked it up in about 5 minutes.
But wait, there's more! Just as more pistons in an engine or brake calipers on your car is more gooder, more pistons in your mountain bike brakes is more gooder. And I decided I needed more gooder. The brakes on my mountain bike aren't bad, per se, but they sure could be more gooder, especially when I do big descents like at a bike park. Good brakes have a couple advantages. First, better stopping.
Second, less hand and arm fatigue which means less falling off the mountain. And third, more street (trail?) cred with the bros. I mean who still rides with two piston brakes anymore??
Just calipers. Most of the time bikers swap out the whole system, but I'm cheap.
The contents of one box
Count them pistons
Old vs New
Four pistons of power!
So that's it. I've been working on bikes again. Somewhere in there, I rebuilt my rear shock. That might have been neat to see, but it also might have been unbearably boring. Thinking about writing that just made me tired, it would basically be an instruction manual.
Now lest you get discouraged and feel this has become a bike blog, I do have a little secret to share: I've gone green.