Friday, November 6, 2020

Fuzzies Underfoot

In a recent blog post I talked a little bit about my noise control strategy. I described the first stage, which is to control panel resonance on the door panels. Most guys go nuts on this step and then stop there. The next step is to add a limp mass barrier, and decouple it from the body structure.

The purpose of the limp mass barrier is to block sound waves, by transforming the vibration into a tiny amount of heat within a membrane (in this case a heavy vinyl sheet known as mass loaded vinyl or MLV). At 1 lb/sq ft, this vinyl is quite heavy, but that is what's needed to block out noise. MLV is often used in building soundproof rooms, and is hung behind the drywall.

How does it work? Well imagine that in the image below, the soccer ball is a sound wave, and the face is a limp mass barrier. The wave hits the barrier, and causes some displacement in the barrier, but the energy of the wave stops at the barrier. The barrier must be decoupled from the body structure so that it remains a limp barrier, if not decoupled, the vibration conducts through the barrier instead of being absorbed. In a car, this decoupling is achieved by adding a layer of foam to the underside of the MLV. So all you have to do is put this mass and decoupler between the noise source and your ear. In a car that looks like MLV and foam under all the carpet, on the firewall, behind the rear seat and on the package tray, and in the door panels if you can fit it.

 
And so I got to work adding gobs of weight to my car.  "Why Jesse, why??" the enthusiast asks. Well here's the thing: this is not a race car, and I'm becoming an old man. I don't need to hear the hum of tire noise, or the drone of exhaust as I cruise down the street. The added performance from a car that is 60 lbs lighter would not outweigh (no pun intended) the benefit of an acoustically pleasant driving experience. Like I said, I'm getting old.

Melting brain cells, aka gluing stuff together
Pattern making with chalk

Footwell MLV installed

Working on the transmission tunnel barrier

aaand the other half

Front barrier complete

The front barrier proved to be a little challenging, due to my modified transmission tunnel. For reasons I won't attempt to explain here, I needed to join my footwell carpet to the MLV that went over the tunnel. This created a bit of a challenge in joining the varied materials,

Carpet with mass backing

The carpet has a mass backing, though it is dissimilar to the MLV and the vinyl cement which works so well on the MLV bonded to the carpet like scotch tape to a greasy teenager's forehead. That is to say, it was crap. So I proceeded to run tests on samples with all the adhesives I had on hand. Luckily I found that weatherstrip adhesive provided an acceptable bond between the two materials.

Testing attachment strength

With the sound deadening barrier covering the transmission tunnel, I was able to apply carpet to the top of the barrier and complete the carpeting in the car.

Masking to prep for adhesive

adhesive on the back side of the carpet

Installed. seams are visible, but it's good enough for me

For the first time since I've owned this car (which is seven years) and likely the twenty years prior to that, the floor is completely covered in carpet. It feels pretty good, and looks reasonably decent. That's all for today, but there will be more to come soon!


Wednesday, September 16, 2020

blog post #97

Here we are again, blog reader. You just keep coming back. That's what I like about you. This time we're working on the interior, same as last time, and same as next time. I don't think I have any good intro stories to tell this time (since the whole COVID-19 thing I haven't seen Frank, Barb or either of their useless children)  I'll just have to get right to it.

Early on in this build I decided that I  wanted to change the color of the interior. It came originally in taupe, which I am relatively certain is a color and not a country in east Asia. As you have seen previously, the front seats are a warm, almost reddish saddle brown and black, so I decided to go with this Rottweiler color scheme for the whole interior. I admit that it's a fairly conservative color combo, but I wanted something that felt like a modernized without destroying the original aesthetic.


But before I can do any of that, I had to take out the front and rear glass. Not only had the rubber of the seals cracked during the Carter administration, the front windshield had a large crack in it, and in order to install a headliner the front and rear glass must be removed. It took a little work to carve away the hard rubber, but eventually I got both windows out. The crack in the front windshield propagated when I removed it from the car, but I was already planning to replace it, and had bought replacement glass from a local Falcon enthusiast.


Hard, cracked rubber seal
Free at last!

On the operating table

Butyl sealer under the rubber seal

Now that I had full access to the dash, I pulled all the remaining trim off the dash, and sanded it down with 400 grit where the sander could reach, and scotch-brite on the more complicated curves. The intention was just to rough up the surface enough to allow the paint to adhere. I chose SEM satin trim black since I didn't want too much shine.


Worst windshield ever


I distinctly remember driving Grace around one summer day when I lived in California and noticing the overwhelming amount of heatt that came through the roof of the car . At that point I knew there was no question that I would find a good insulation to go above the headliner when I finally did the interior. I looked into hydrophobic melamine foam (it's the same stuff magic erasers are made of), and had initially planned to use it as a thermal barrier and sound absorber. Somewhere along the line I came across thinsulate's automotive insulation. It had similar performance properties to the melamine foam, but was half the price. I was able to get a 5'x5' sheet for about $50.
 

FLUFFY!

Mid install view of the dampener tiles on the roof

During install

Like a comfy quilt

The installation was straightforward. I cut it to width and then sprayed the back of the material with a general purpose upholstery adhesive. I sprayed the roof as well, and after both sides were tacky, I pressed it in place and used the headliner bows to hold it up. It came out nicely and the acoustics of the inside of the car were actually noticeably changed, with less reverberation and high-frequency noise.

 Next up was the windlace. I'm still not 100% what windlace is for in this application (maybe it's supposed to reduce wind noise?), but it's basically a 3/8 inch diameter foam rod with cloth sewn around it. It is installed into clips around the door openings. It wasn't a particularly hard job, but did require that I remove the tack strips on the sides of the car which hold the headliner in tension from side to side.

New windlace

Windlace clip, with old windlace

Finally I was ready to install the headliner. I found a headliner in a perforated vinyl on eBay, but when I tried to install it, it quickly became clear that this was not the right headliner. After some back and forth with the seller, they sent me a new headliner which turned out the be the right one. 

I had been fearing the headliner install for a long time. I watched a lot of YouTube videos on how to do it. In addition to providing good information, they also provided a great deal of fear and anxiety. Some guys were saying it takes 8 hours for a professional to properly install a headliner. I'm sure it took that long with the windshield removal and windlace install, and my install was far from perfect, but it's not all that bad. It just involves a lot of careful pulling and stretching.

The starting point

spring bows installed, headliner hanging in place

The magic schmoo for attaching the front and rear of the headliner

gluing the headliner to the front pinch weld

Front pulled tight

Rear pulled tight

Front and rear pulled tight from the inside

Tack strips
Pressing the headliner into the tack strips

All done!

It's amazing how much of a difference it makes to see a headliner in there. Its starting to feel like a car again, and not just an old tin can. As you can see, its not a perfect job, but the wrinkles in the upper left are not as bad in real life as it looks in this picture. I might be disappointed in the job if I had paid a professional for eight hours of labor for this result, but for a first time DIY, I'm ok with it.  I still have so much to do (thanks four-door car...) but it's coming along.

The other day, I walked outside and was greeted by this little creampuff. I was hoping it was a late birthday present from my wife, but it turns out a guy from a few streets away just ran out of gas while trying to get to the gas station.


That's all for now, but as you know, there's always more to come because this project will never be done.

Sunday, July 5, 2020

Inner Beauty


Grace is an old girl with a lot of charm, and while her exterior is absolutely perfect, it's what's on the inside that counts, right? The time has finally come to do a little interior work. In my old age, I'm appreciating the finer things in life like cars that have door seals, and dash pads that haven't had cracks for longer than I've been alive.


I started by stripping out the whole interior, save for wiring and steering wheel. The condition of everything not made of metal is about what you'd expect of 58 year old items left to bake in the sun. The dash pad basically crumbled in my hand as I pulled it out.

This speaker is able to play The Beach Boys hits at the ideal volume for optimal car show enjoyment

With the dash pad, windshield trim, dash trim, knobs, radio, glove box door all removed, I proceeded to the seats, carpet and seatbelts


Now that everything was put of the car, I could do the first step, which was to prep the floor pan for paint. I had been dreading this part of the literally for years. I hate paint prep, it's nasty tedious work and I was worried I'd be at it for hours on end. A few years ago, I did a little bit of work on the floorboards that confirmed this suspicion. Thankfully this time, I saw something online recommending Harbor Freight wire wheels for stripping away paint and crud so I figured I'd give it a shot. Harbor Freight delivered.


The "before" picture


Have you heard?  There is a shortage of N95 masks. Something about a virus?

These fine wire wheels made the paint and rust removal go very quickly, I was pleasantly surprised. Previously I had only used DeWalt thick wire wheels, and while they were very durable, they didn't do the job nearly as well. At 4-5 dollars a piece, they are well worth the money. I must add a word of warning: ALWAYS WEAR PROTECTIVE EQUIPMENT. These wire wheels shed many wires at high speed. They'll stick in your clothes, occasionally your skin, and if you don't wear safety glasses, your eyes. I'm not the smartest man, but I ALWAYS wear safety glasses anytime I'm running an angle grinder. Eyes are cool, protect them.

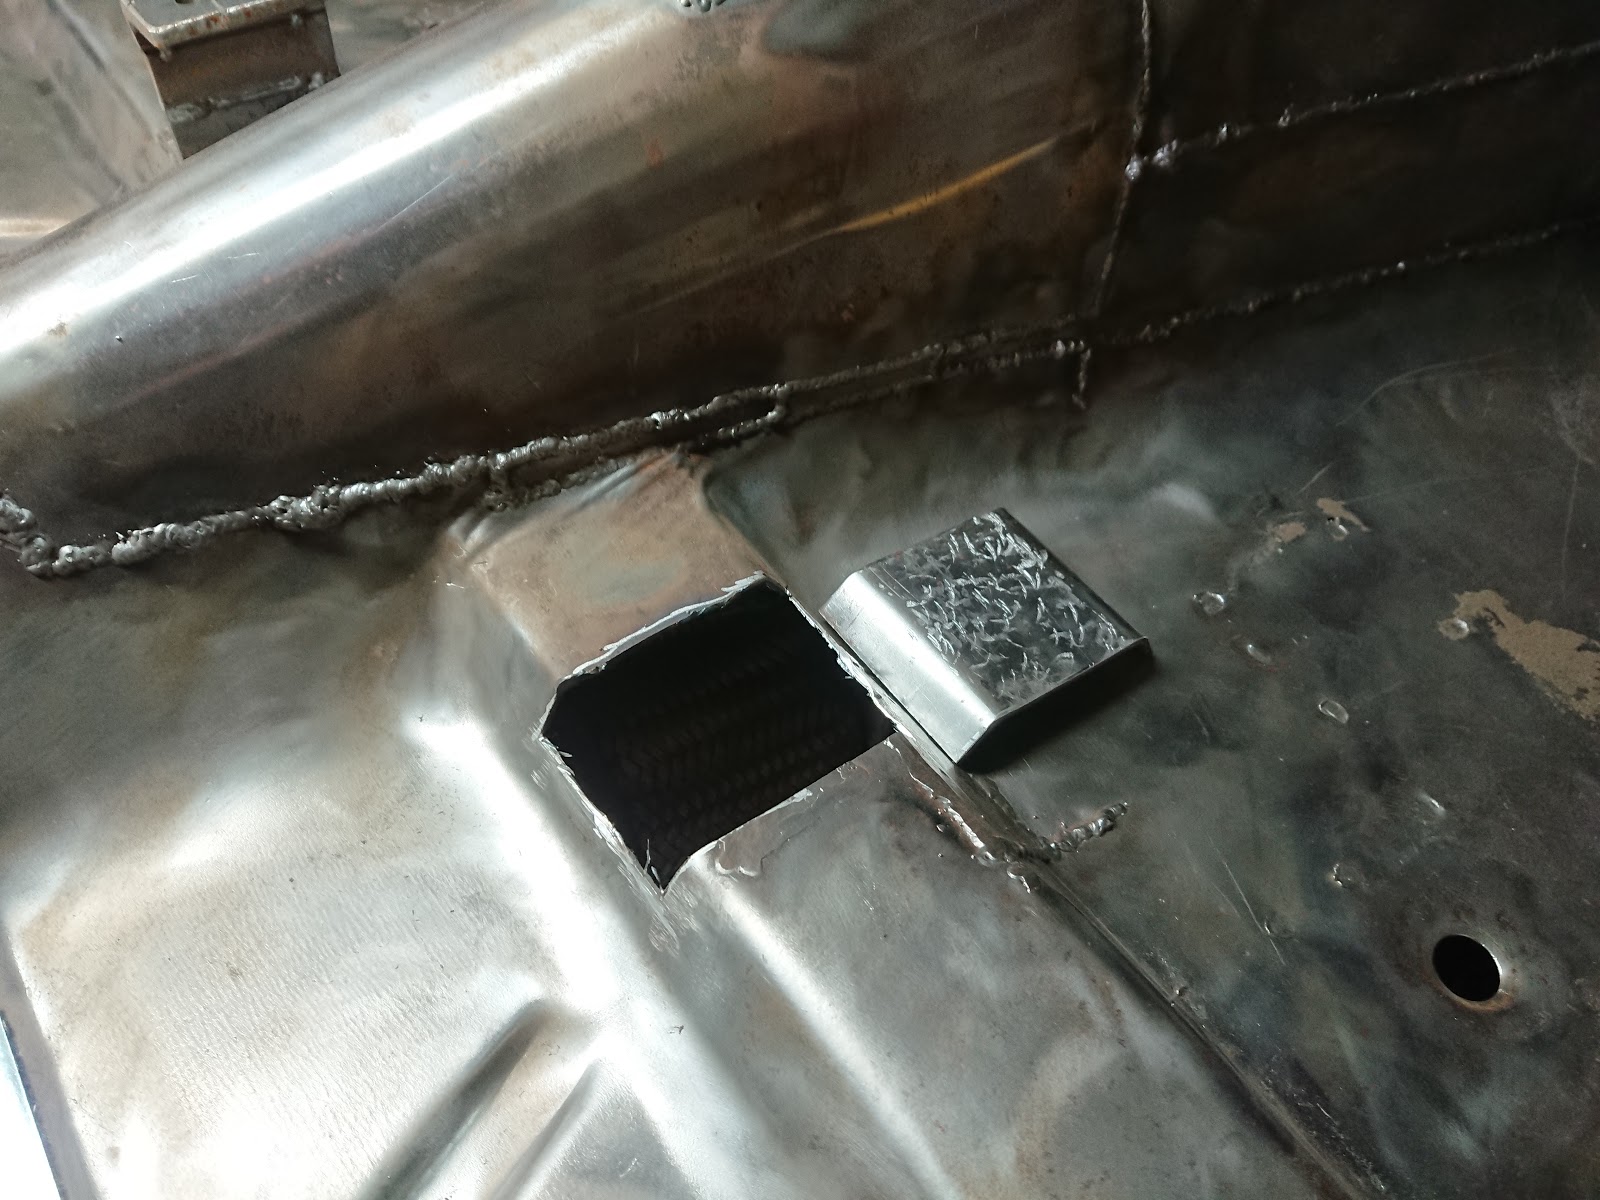
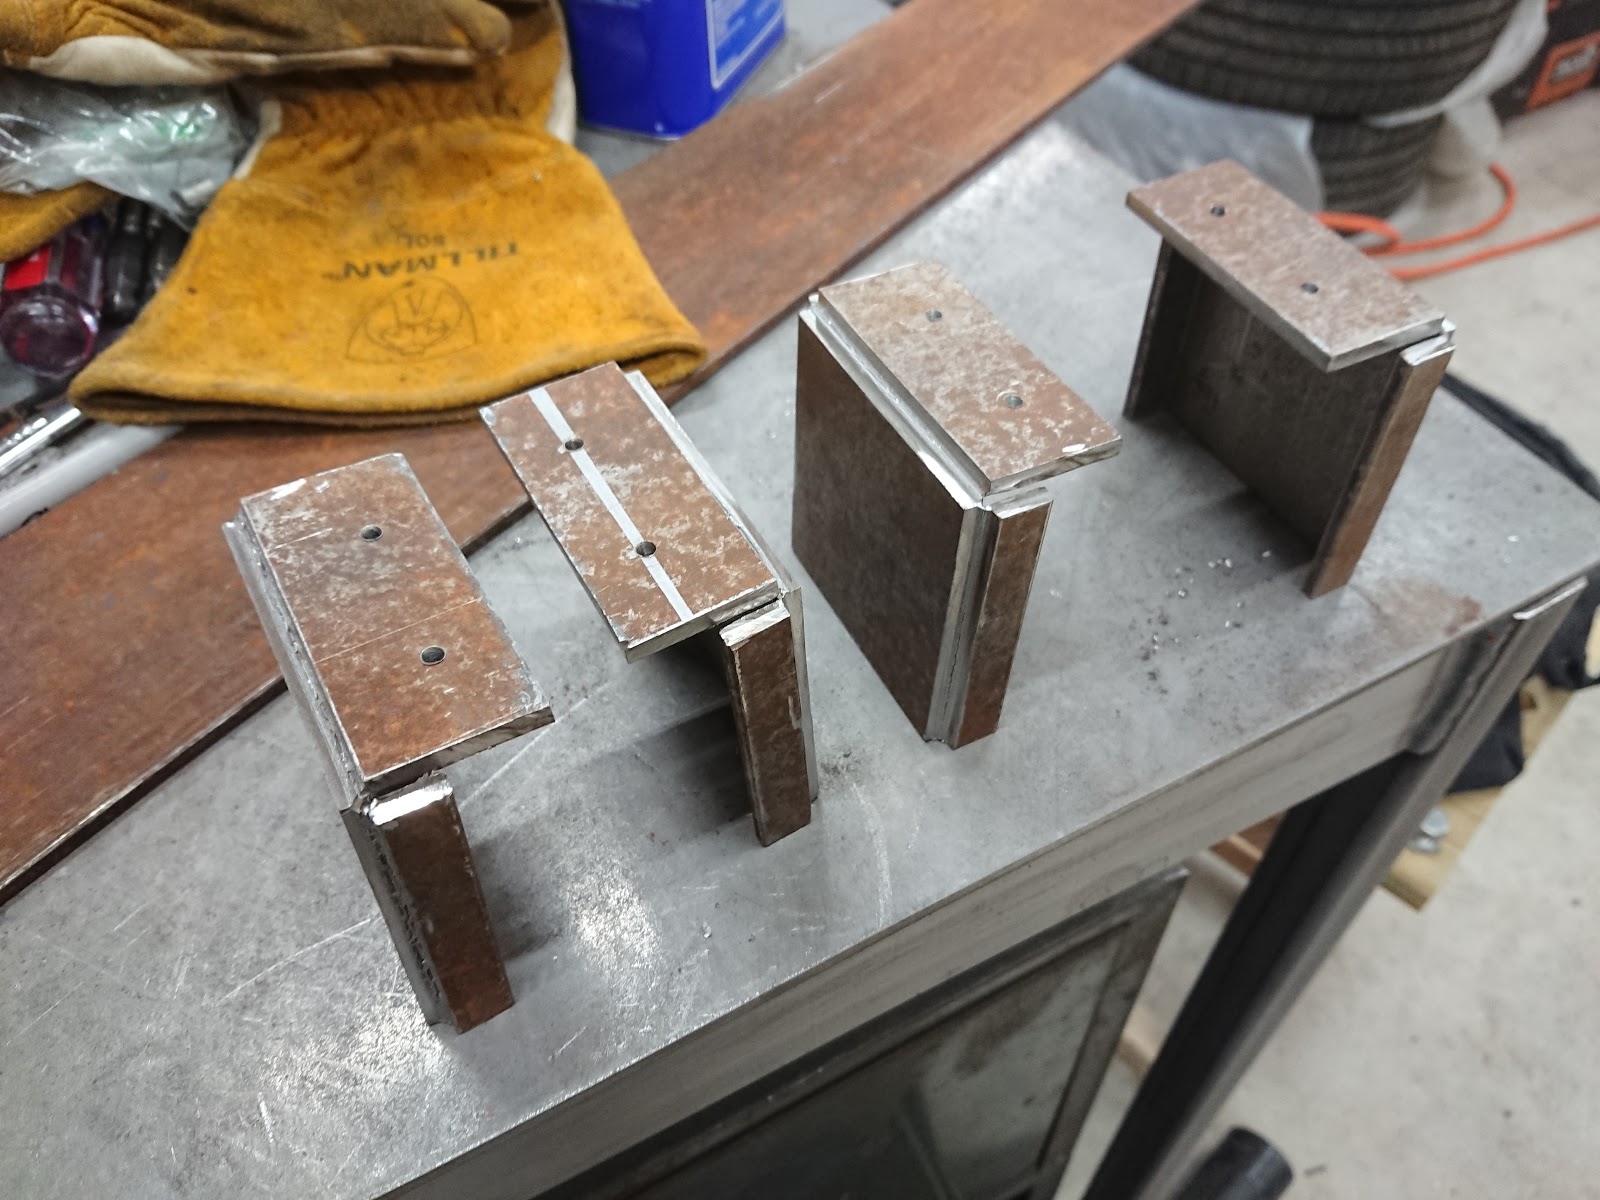
The plan has always been to paint the floor pans with POR 15. POR 15 is an incredibly durable paint, but it requires a ton of very careful prep. If you don't follow the process, it's a terrible paint. I only wanted to do this once, so I decided that I should make sure everything on the floor pan was final. One thing that has bothered me for a long time was the front bucket seat mounts. When I first built them, I made them an inch too short, and later had to add in an extra inch of material.While this was functional they were sloppy, and I wanted to do them right. So out came the angle grinder, and I got to work.

Falcon sheet metal is not particularly thick nor rigid, so I welded new 1/8 steel seat mount supports


Rule 1 of internet welding (or dating), only show your good side
New on top vs old on bottom
Floor pan fully wire brushed with new mounts welded in.

This little detour took entirely too long. It was probably a month's worth of evenings a couple times per week. With the new (much more attractive) solid seat mounts welded in, I then went through the paint prep process. First, I vacuumed the remaining crud out of the floor pan, which was followed by blowing compressed air in all the nooks and crannies of the interior sheet metal. Repeat 7x. Then I used the POR 15 degreaser compound to scrub any remaining dust, dirt, grime, or vaporized seam sealer from the floor pan. I rinsed the pan. Immediately thereafter, I applied POR 15 Metal Prep. It's some combination of acid and zinc which etches and coats the metal. This has to stay damp for 20 minutes at least, and is then rinsed. Before applying paint, the metal must be bone dry. I waited two days and then brushed and rolled two coats of gray POR 15 to the pan.

It's supposed to look like this, I promise!


Ahhh, much better

I think it came out quite nicely. If my prep work did it's job, I should have an impermeable coating on the floor pan which won't rust, even if it somehow ends up constantly wet (as is often the case when a window seal leaks and soaks the carpet padding in an old car).

With this step finally complete, I was able to apply some sound dampener tiles to my floor. This is a product known to generically as "Dynamat" or sound deadener, and it is almost always used incorrectly.  Most users assume that this material blocks noise from entering the vehicle. In reality it is simply to keep body panels from resonating and amplifying structure-borne vibrations. The engine, tires, exhaust, transmission, or even fuel pump can cause this vibration and if it matches with the natural frequency of a body panel, it will amplify the sound. When these tiles are applied, the butyl rubber on the back absorbs these vibrations and turns them into the tiniest bit of heat. The aluminum foil on the face protects the butyl and keeps it from sticking to everything it comes in contact with. The flat areas of the body structure get about 25-30% coverage with this material, any more than this is a bit of a waste as it typically doesn't further improve vibration damping performance.

I had purchased damper material from Sound Deadener Showdown four or more years ago, with high hopes of using it soon. Better late than never I suppose. Sound Deadener Showdown has since shut down operations unfortunately as the operator of the site has retired. It is however still a fantastic resource for anyone looking to improve the noise level of their car interior.


Thick aluminum foil on top, butyl rubber on bottom


Will I do more? Or is this enough. There's only one way to know!