Yesterday was a bit frustrating. I finally tried to work on Grace again after only spending about a half day on her in the past 3-4 weeks. I didn't know where to start, didn't have the parts I needed and got easily distracted. I felt like I'd lost my edge. I know I need to chill out since I've just lost a little momentum compared to the rate of progress in the past few months, but it scared me a bit.
Today was a pretty good day. I went to AAA to do a little bit of musical plates and finally register Grace. Back in 2012 or 2013, I pre-ordered a set of California Legacy Black plates. They would only make these plates if 7500 or more were ordered, and the program being run by the California State government, it took two years to actually get them.
The problem with that is that I had ordered these for my Subaru Legacy GT, but no longer wanted them on the Subaru, I wanted Grace to have them. Sharon at the Torrance office was my cheerful guide through this experience. For those who don't know, California DMVs are the actual ninth circle of hell, where Satan himself won't go. This is why I pay for a premium AAA membership, as they can do title transfers, registration, and one 100 mile tow per year. Not having to go to the DMV alone pays for the membership, but having the insurance of a 100 mile tow is also very peachy, considering that this Falcon is about 70% of my own design and manufacture, and the rest was designed by some guy from Detroit named Herb wore a pocket protector, used a slide rule, and died 25 years ago from emphysema. Anyway, I learned from Sharon that I needed insurance before I could complete registration. I was about to get classic car insurance (comprehensive, 3500 miles per year, agreed value of $18000) from AAA for $140/year, when suddenly Martin the insurance salesman crushed my dreams. I don't have a locking garage at this point and as such, can not have a classic car policy. I had to go through Geico, and am paying $500/year for liability only. I need a garage.
But on the bright side, GRACE IS LEGAL! I can actually drive her on public streets without riding dirty, and that's a beautiful thing.
I would also like to take a minute to speak about the best new car in the world. If you've been with me for a while, you know that I love the Porsche 911. Well now I'm going to say that it really truly is the best new car in the world. Why? Is it the maddened yet sonorous growl of 400 horsepower? No. Is it the PDK transmission that knows your thoughts before you do? No. Is it the razor sharp steering or the glue like traction? Nope. It's the steering wheel. "Well what's so great about the steering wheel, Jesse?" I can hear you asking, dear reader. It's the steering wheel.
The steering wheel? What's so great about it? What does it have that others don't? It's actuall what it doesn't have that others do. What is it lacking? Look closely.
THERE ARE NO BUTTONS SAVE A HORN BUTTON! PRAISE THE LORD! I HATE BUTTON ENCRUSTED STEERING WHEELS!
They also ditched the stupid shifter buttons they used last year and replaced them with paddles, which is awesome. Welp, I better get off this computer and go get Jen so we can drive until she pukes!
Life has been rather busy and I've neglected you, dear reader. I'm sorry. Please accept this blog post as a gift of sorriness. I haven't had time to work on Grace in quite a while either, so this post is looking back a few weeks.
I thought it might be a good time to put a partial exhaust system on the car so that I didn't get smoked out every time I start the car, and to quiet it down a little bit so that the mechanic doesn't get in trouble again. I used Columbia River Mandrel Bends for my exhaust tubing, and Summit Racing for my flex coupling and resonator. The plan was to make an exhaust system that terminates in front of the rear axle for the time being, and later add a muffler and tailpipes at the rear of the vehicle.
One challenge I've always had when trying to cut tubing, especially bent tubing, is that I fail to cut the tubing perpendicular to the tubing centerline radius. This time I decided to try something new. I wrapped a wire around the tubing and twisted it until it was tight and then marked it with a sharpie. It didn't produce perfect results, but it was generally better than other methods I've tried.
The exhaust system works for now, but I can't say that I'm thrilled with the fitment. I will have to do a major overhaul once the more important things are worked out.
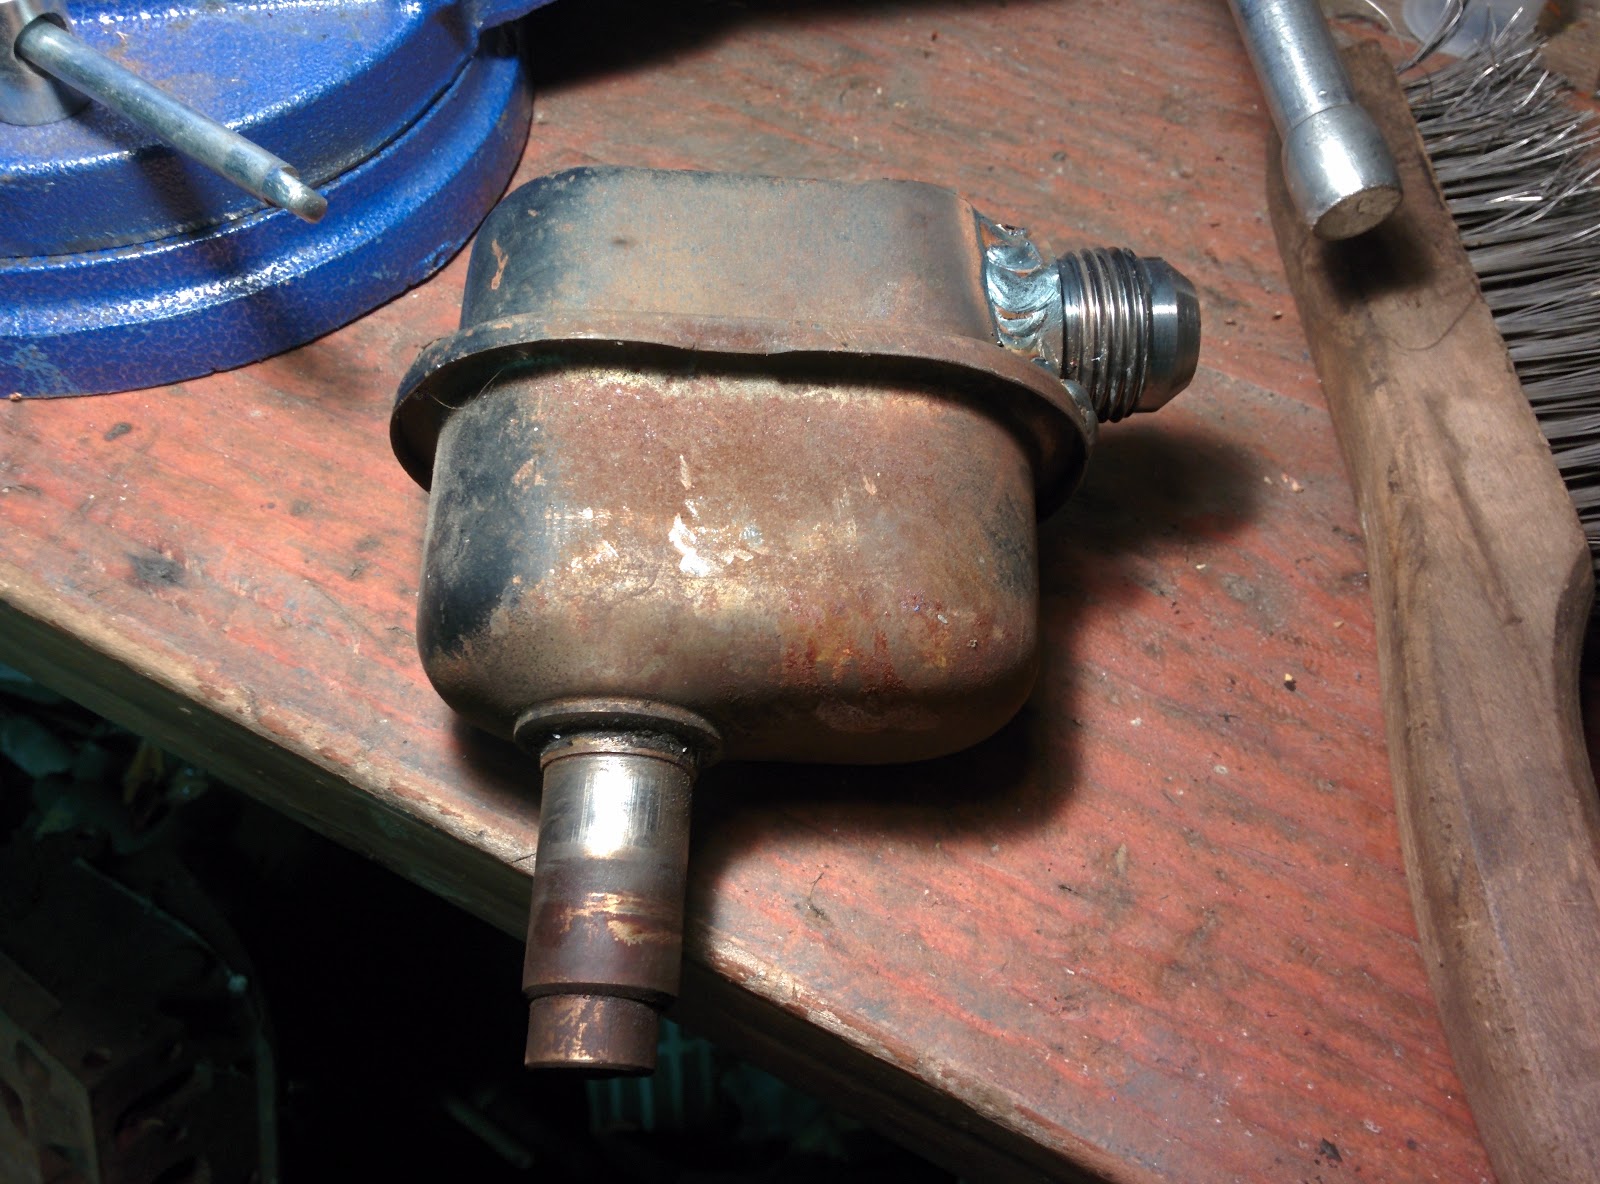
The second time I took Grace around the block, I let her get into the boost a little bit. Like a new puppy, she was eager to play, but also like a new puppy, she peed all over. I did not have a functioning PCV system at the time and so crankcase blowby came rushing out the block breather with a healthy portion of oil. When I had this engine in the Ranger, I used a catch can to capture any oil that escaped the crankcase as well as vent excess crankcase pressure. I wanted to clean up the installation of the catch can a bit compared to how it was in the ranger, so I spent a few extra dollars on AN fittings and bungs for the system.
After installing the catch can, I took grace around the block and let her boost to her heart's content and did not notice any oil loss due to the boost. Unfortunately that doesn't mean that there aren't any leaks at all, since 2/3 of my vehicles feel a need to mark their territory. This morning while working at 3 AM (I'm in Arizona for vehicle testing and it's too hot to test during the day) my coworker Dwayne told me to try Loctite 574. Apparently it is a crankcase sealer developed by Porsche, which was just recently made public. At $18 an ounce, it had better work miracles.
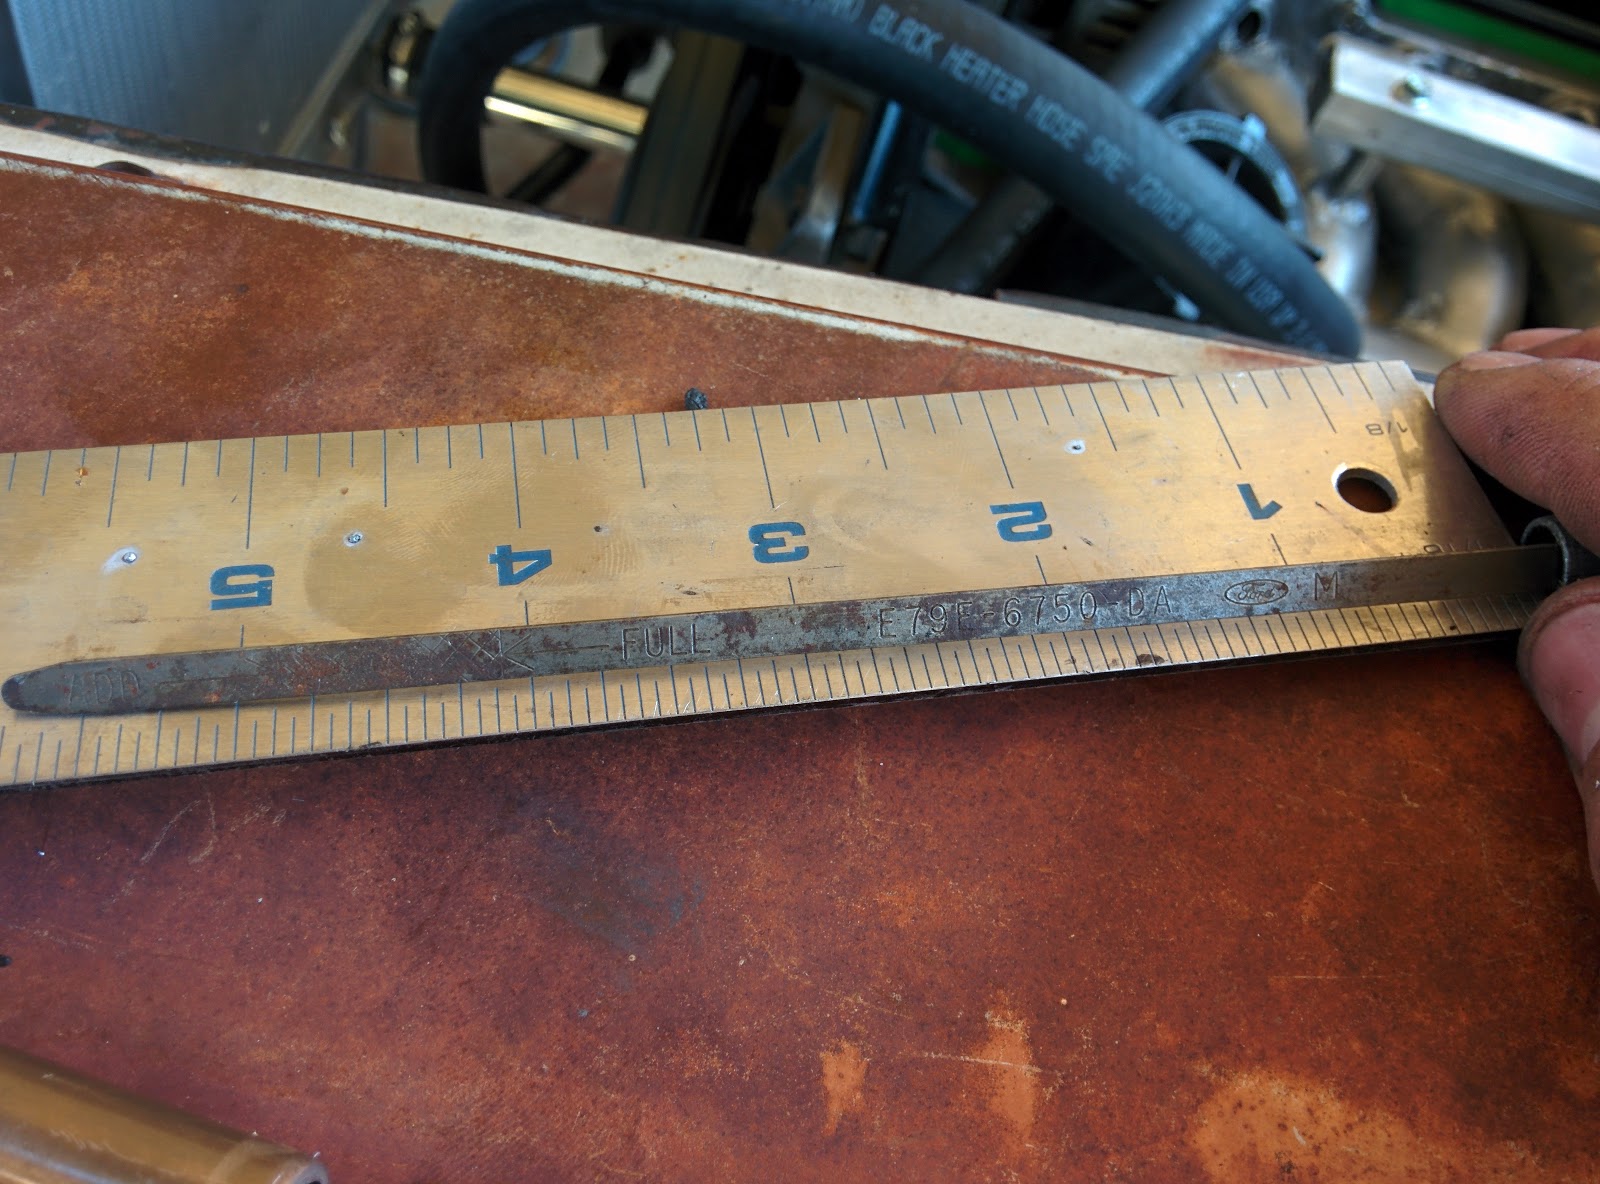
Dipstick tubes are not a car part that occupy my mind very often, and I've never seen anyone write about how they made a dipstick. (sidenote: dipstick is a funny word) But over the past couple weeks I thought about how I would make a new dipstick tube since it was very obvious to me that the old one would not work. As it turns out, I should not have spent so much time worrying about how I would fabricate a dipstick tube and just gone outside and made one. I noticed that my 3/8 fuel hardline was similar in size to my old dipstick tube. I tested the fit on the spare engine block that resides under my carport and so my surprise, it fit snugly but perfectly. I then bent the tube to fit around the intake manifold, trimmed and marked the dipstick, and welded a threaded boss onto the 4th intake runner to hold the tube into place. The whole process was very painless and I was thrilled with the results.
Left: original dipstick tube Right: new dipstick tube
measurements from the original dipstick
trimmed dipstick
Current state of my engine bay
There were two other small issues I found. First, power steering was not functional and actually began to leak. After closer inspection, I found that I had installed my power steering flow valve backwards and I had a damaged O-ring on one of the fittings. Second, unsurprisingly, I found that my intake manifold flange was severely warped from all the welding I had done. I will need to remove the manifold and have it machined, but in the meantime, I made a ring of RTV around all the ports and installed it.
Ford power steering flow valve. If it pops out, don't just
put it back in and say "it'll probably be fine".
Damaged O-ring
quick'n'dirty
OK dear reader, now that you've made it this far I think it's time for full disclosure. The real reason I haven't posted in a couple weeks is because we cancelled our Verizon internet and were waiting for the Time Warner Cable to be installed... wait no, that wasn't it... Oh yeah! I got engaged. I guess that means Grace will have mom, though I'm pretty sure her parents won't love her equally. But yeah, I've been a little busy with that, and with work. In a week or two I should be able to pick up the wrenches again. In the meantime, party on.
With Jen in Sequoia National Park, where I gave her the precious
Edit: this is my 50th post. Woohoo! I also just eclipsed 40k views, which probably isn't that much, but it feels cool. I also wouldn't mind if you subscribed to the blog.
I think it goes without saying, but big things are happening here at the Iron Hydroxide HQ. Grace is alive. She runs and even drives. I took her around the block last night. I have internet. This is evident because I am blogging again. And roomate Vaughn is smoking a salmon and t-bone steaks for a celebration dinner.
Unfortunately my phone has a terrible mic, so all my videos sound like they were shot in a pineapple under the sea, but you get an idea of what the tractory turbo beast sounds like. There is still a ton to be done before she's road worthy, but she runs quite well for a totally un-tuned setup. I didn't dare get too crazy on my test drive since she's full of parts and who knows what other surprises, but it was good to see her progress from a rolling money pit into a driving money pit.
The neighbors must have noticed my working frenzy over the past few weeks and been drawn to it because last week I had 5 different neighbors approach me while I was working on the car to chat with me about it. I've spoken with the next door mechanic, Don, on previous occasions so we chatted about his health since he'd been having some scares with his diabetes but is doing great now. Don and all the other friendly neighbors aren't the only ones who have noticed though. I got a nice nastygram in the mail from an un-named sender. Don was appalled when I told him about it.
Stupid mechanic...
I've been promising a blog post about wiring for about two months now, so I guess it's a little late, but better late than never I suppose. Wiring is one of those parts of the build that is ironically dreaded and overlooked at the same time, more so than any other system on the car. It's like car guys feel that if they ignore it, it will go away. Of course this feeling is understandable, considering the massive amounts of wiring in modern cars. But I'm here to tell you something that if you are a gearhead you'll probably disagree with (If you aren't, hi, welcome to Iron Hydroxide. I'm Jesse, and I have an addiction). Wiring is fun.
Yep, you read that right, wiring is fun. I guess I should put some qualifiers on that. Tracking down a slow current drain in a modern car, or trying to figure out why your Jetta dies when you turn on the blinker is not fun. But rewiring a classic car from from the ground up is fun. If you spend the money (and you'll do a lot of that) to get good supplies and components, its a relatively easy and relaxing job. The yoga poses required to run wires under the dash aren't always awesome, but it's no worse than wrestling a greasy transmission into submission.
At this point I've only wired the functions necessary to run the engine but left the chassis un-wired. I had a few rules for myself when wiring this car. First, there would be no splices in the wires. This was difficult because the terminals you crimp to the ends of sensor wires are extremely varied and can be incredibly hard to find. It's not something that is stocked by auto parts stores or even auto wiring shops. Eventually I contacted Ron Francis Wiring, the vendor that sold me my chassis wiring kit because they also sell factory replacement wiring harnesses. They were incredibly helpful in helping me find the terminals for my crank sensor and throttle position sensor and sent them to me for a very reasonable price.
Ford crank sensor terminal
Ford throttle position sensor terminal
Second, I insisted that all my wires be larger than they needed to be, and grounded better than they needed to be. This meant running 1 gauge battery cables, both positive and negative, from the battery box in the rear to the front of the vehicle. The Ron Francis Express wiring kit I used also provided wires that exceed their necessary size. I got the Express wiring kit from them and have been very happy with it so far.
Third, I refused to solder any connections on the chassis or engine wiring harnesses. I would crimp an heat shrink every connection. I've mentioned this previously but this required me to buy another tool which as I'm sure you've noticed, I really hate can't stop doing. I inherited this affliction from my dad, Pa Davis. I think he's a compulsive tool buyer. He'll see a four foot long set of channel locks and think "I'm sure I need that for something". I'm not sure he ever does, but I always ended up finding a use for the four foot channel locks. In this case I had to buy a cable crimper. I suppose I could have found a stereo or lowrider shop to crimp my battery cables for me, but I didn't want to rely on a shop to complete this job, and why would I pass up an opportunity to buy another tool. The upside is that I've used this crimper way more than I thought I would and it only cost $35.
And fourth, I decided that all my harness wrap would be braided style wire sheathing with heat shrink protecting the ends. I had used this before on a project at school, but when I built my computer, the power supply had this style of wire sheathing and I fell in love with it all over again because of how tidy it made the computer case look.
My overkill mindset carried over into the battery, where I ended up buying a 750 CCA battery for a low compression 4 cylinder. I suppose this battery is a little large for the Falcon, and a bit of extra weight, but with the 1 gauge cables it spins the engine at 350 RPM while cranking (normal is 200-250) and I won't have to worry about it dying on me.
I also went with at 130 amp alternator from a Taurus. This is a common upgrade done to 1980s fords, as they often came with weak 60 amp alternators. Some have suggested I add a larger charging wire since this is only an 8 gauge wire on the alternator. I have the supplies and will probably switch to a 4 gauge charging wire.
It can be a bit difficult to show any meaningful pictures of wiring harnesses, so I'll just post photos and captions. That's what the kids are doing on the instagrams right? (yes I'm on instagram too) @gearandlightning #metamucil #hotmixtape #hashbrownsofinstagram #followme #veganbacon #glutenfree
Wires!
GM intake temp sensor and wires
83 lb/hr injectors with EV6 connectors
Coil connector
Firewall pass-thru
Boost control solenoid with incorrect wire colors (black is a +12v wire and should be red)
Boost control solenoid corrected
DIY Autotune relay board before wiring
DIY Autotune relay board after wiring (under dash, driver's side)
I wish I could tell you that after wiring, I turned the key and it fired up instantly. Such was not the case. after blowing a few fuses, I found that my ignition coils which I thought were LS1 type coils were actually LS2 type coils. In all honesty I did not realize that there was a difference, but there is. They use the same connector, but the wire positions in the connector are flipped. This meant I had to de-pin and re-pin the coil connectors.
After correcting the coil wiring, I still could not get spark. I had a few days of near insanity trying to track down the issue, but eventually realized that I had misunderstood the labeling of the printed circuit boards in the ECU and relay board. If you are a Megaquirt user, read on. If not skip ahead or prepare yourself for this:
S1, S2, S3, S4 on the relay board DO NOT correspond with spr1, spr4, spr3 and spr4 on the ECU as I had assumed. I had my ignition trigger wiring on s2 and s3 (relay board).
I had jumpers from pad1 to spr2 and pad3 to spr3. There are two problems with this when using the relay board. the relay cable does not have wires in pin locations 3,4,5,6. This is where spr1, spr2, spr3, and spr4 are located. The second problem is that the spr outputs on the relay board are hidden from view, and to not have any terminals attached to them.
So in order to fix this, I kept my wiring harness the same, but removed all the jumpers that had previously connected
js0 > iac1a js1 > iac1b js2 > iac2a js2 > iac2b
and then put jumpers from pad1 > IAC1B pad2 > IAC2A
Previous board setup
Current board setup
Ok dear reader, you can come back now. So yes, Grace is finally mobile. I'll register her next month. But as you can see, she's far from finished. It's just starting to get good, so stay tuned.