Monday, April 27, 2015

She belongs to her mother and the State of Ohio

When I was in college, the turbo Ranger was my daily driver. I use that term loosely because all too often I found myself taking a bike to work for three weeks at a time while trying put a new engine in, or figure out why there was a trail of gasoline behind me when I drove, or why I kept frying fuel pumps, or was waiting for a new ECU to show up after the previous one had shorted out, or was installing yet another transmission. Not that any of those things ever happened... but they all did. And that's not even the short list of problems I had. 

One time while discussing this problem with my buddy Jackson, he said "It's like this, Davis. Your truck is like a body builder all pumped up on 'roids. The joints and bone structures just can't take that kind of stress!" He was absolutely right. The Ranger had 88 HP when new (and probably about 68 HP by the time I got it. At one point during college, I was pushing about 28 PSI through the intake and probably making four times as much power as stock. So just like a 'roid raging AHHHNUHHLD my truck was tearing itself apart at the seams because of it's own strength.

GO NOW! GET TO THE CHOPPPAH!
For this build I've realized some areas that were sorely lacking on other builds. A few of the core values for this build are ease of service (Looking at you, 2008 BYU Formula Car ), handling (the Ranger), durability and ease of use (both of the aforementioned vehicles). You may have noticed that many of the parts I've built and selected were selected to meet those targets. The parts in this post are no different. They are in a way, a stronger bone structure for the moody, lactating, bulging little engine under the hood.

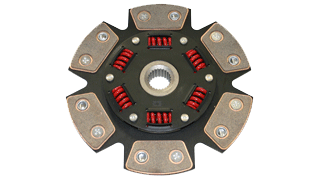
In the Ranger, to hold the torque the engine was making I had to use a six puck ceramic clutch disc like the one below, coupled with a Centerforce Stg 2 pressure plate. It held but it approached the practical limitations of that clutch size and made for unpleasant city driving. A few years ago I injured my foot and it would not heal until I stopped using that clutch for a few weeks. I knew for the Falcon I had to find another way.
The stock Ford 2.3 clutch is either 8.875" or 9.25" diameter (depending on the year) while the 5.0 V8 clutch is 10.5". The larger clutch allows a lighter pressure plate, and subsequently lighter pedal feel with the same torque capacity. Canfield Engineering makes an adapter plate which I've discussed in a previous post, and Stinger Performance sells an aluminum 5.0 flywheel, drilled for the 2.3 pattern. With those parts and a 5.0 bellhousing, I could then use a 10.5" Ford Motorsport King Cobra clutch kit. It is supposed to hold in excess of 350 lb-ft with a stock pedal feel.

Spec flywheel, King Cobra clutch
Canfield adapter plate
Cluch and Flywheel looking majestic in the evening sun
Once I had bolted up the flywheel and clutch, I needed to re-install the transmission. It was easy enough to get out, I just loosened some bolts and let the transmission fall on my face. Putting it back in was a bit tougher. Luckily the kid who drives an El Camino and has a name (I assume) showed up. The kid with the name's dad rents some space behind my house (the space where backyard Steve used to live, for the long time readers who remember BYS) so he is constantly going in and out of the back yard. Anyway, I grabbed the kid with the name to help me put the transmission in and bolted it back up.

Now that the flywheel, clutch and clutch fork were in place I could finalize my clutch slave cylinder bracket. I had previously made a bracket which I felt was pushing the slave cylinder too far into the driver's footwell area. This was an issue because I would have to shape the footwell sheet metal around it and it move the accelerator pedal too close to the brake pedal. After a little angle grinder magic, the bracket was the right shape.


It's taken me far too long to finish this post, so let us xhave celebration dance comrade!


Stay tuned, I've been working hard and will be writing about it in the coming week.

Monday, March 30, 2015

All These Buckets of Rain

WORLDSTAAAAAAR!!

That's right, party people, I'm back! I understand if you think I've been slacking. I haven't written an update in several weeks. Maybe months. But who's counting (besides Scott)? In reality I have been giving Grace my attention whenever possible.

After agonizing about which radiator and intercooler to use for at least three weeks, I finally settled on an aluminum radiator for a 1964 Mustang and an eBay intercooler that would fit around the Mustang radiator. Let the record show that a radiator from a 1964 Mustang will fit into the front of a 1962 Falcon with only minor trimming of the lower core support. There is a pinch weld that interferes with the lower tank which can either be trimmed off or bent out of the way using the Clarkson method.


The Clarkson Method (may he rest in peace)

I'm relatively certain that the radiator install was the simplest job I've completed on this car to date. It was almost like a normal car repair where you just remove an old part and then bolt in a new one. I've almost forgotten what that is like. Then, with a quick zip from the 3" hole saw through the core support for the inlet and outlet, I installed the intercooler.


Due to the somewhat unique engine install, I wasn't very confident I would be able to find rubber hoses that would suit my application. So rather than messing around with parts counter people, begging to see their hose collection, I decided to make metal coolant pipes with silicone couplers on each end. Once I had paid way more than I expected to for pipes and couplers a gigantic box showed up on my doorstep filled with not 76 watermelons, but a collection of hose clamps, madrel bent stainless steel and aluminum pipes, and silicone couplers. 

Stay with me for a minute while a take a small detour. I feel a need to air a grievance while providing education for the masses. I find that it is a very common thing for car enthusiasts to confuse silcone and silicon. Silicon is used in circuit boards and as an alloying element in metals. It is a hard brittle substance. Silcone is a rubber like compound used for caulking your bathtub, attracting the attention of men, and connecting intercoler pipes together. Learn and understand the difference so that you don't sound like an idiot. End rant.


Back on topic, I cut the pipes using my grinder and a cutoff wheel or a chain style exhaust cutter. Luck was on my side because the pipes went where I wanted with minimal trouble. I then tacked them into place with my MIG welder.


"


Thanks to my former manager Dan, we have a program at work called Tech Days where one day each month after work, we are allowed to use the shop at work for personal projects. This month I chose to weld up my pipes using the TIG welder at work. You can see from the photos that I'm a far cry from a great welder, but I'm happy with the result. Unfortunately I missed one of the parts when I placed my order so the turbo to intercooler pipe will have to wait.

COLD AIR INTAKE GOOD FOR +50 HP AND 6-7 MPG! DOUBLES YOUR VTEC!

intercooler to throttle body pipe

Stainless Steel weld, slightly too hot. The weld should be a gold and blue tint
Upper and lower coolant pipes
Cold Air Intake mount point
Intake from fenderwell
 I also decided to provide a solid mountig for the intercooler by welding tabs on each side and attaching weld nuts to the back side of the core support to mount my intercooler.

Tacked in place on the other side
Preheating with MAP gas
Welded
Cleaned
Fits just right
Last week I had the chance to go shopping at one of my favorite places, the wrecking yard. I got the chance to introduce my buddy Bret to the joys of wrecking yards. When I was in high school, one of my favorite time killers was to wander the wrecking yard and learning which engines game in which cars and which parts would interchange between them. The more I've learned about building cars and fabricating, the more I've realized that all parts can interchange if you believe in yourself and are handy with an angle grinder.

Parts from a Ford Ranger, Ford Taurus 3.0, Ford Taurus 3.8, and Chevy Suburban, all bound for the same Ford Falcon
#SWAGFORDAYS
Chevy Suburban Coils (LSx coils) mounted on a Ford Ranger valve cover

LSx coils and stamped steel valve cover on the Falcon
Chevy LSx igntion coils are notoriously strong and have a built in ignitor, making them easy to control from a Megasquirt ECU, so I was pretty stoked to find them for $35 at the wrecking yard. I was also excited to find a stamped steel valve cover from a Ford Ranger to mount them on. I've decided to remove the cast aluminum valve cover that I've  had on that engine for about 10 years and use the stamped steel unit. It will be more practical and help achieve the pseudo OEM look I want for my engine. At the wrecking yard I also found a 130 amp alternator from a Taurus and an electric fan reported to be a popular uprade for vintage mustangs.

In an attempt to keep this Falcon easy to service, I've tried to incorporate features to simplify assembly and dis-assembly. The new 130 amp alternator required a wrench on each side of the bolt the holds it in place as well as a wrench to tension the serpentine belt, making the whole process difficult as it requires 3 wrenches and 3 hands. Instead of receiving a controversial 3rd hand transplant, I made a nut for the back side of the alternator that would reduce requred hands and wrenches from 3 each to 2 each.


I feel like I've been seeing real progress in the past few weeks, as well as spending ridiculous amounts of money on odds and ends. And while it may look like I'm getting really close, there is still a ton to be done. This is what my recently made to-do list looks like. Mind you, this is only what is required to get the car on the road, not what it needs to be fully functional.


So yeah, I've got my work cut out for me. I'll just take it a bit a at a time and eventually I'll get there. On that note, I'll leave you with a hot rod I recently built completely in the space of one evening.


Wednesday, February 18, 2015

I don't care if it's 7 in the mornin', for all I care it could be the Second Coming

It's that time of year again... Last week I worked 68 hours, the week before was 60, and the week before that was 73. It's the end of fiscal year and I am cramming to analyze data and finish reports. So I think it goes without saying that I've not been getting any work done on Grace. To be honest, I've not been getting any laundry done. So here I sit in my last pair of clean underwear, dear readers, at 11 PM, writing this for you. And sadly don't really have much to say. But I do have a video of some Ozzies in a Falcon doing the Lord's work.


In closing, there is no room in my bedroom because it is full of car parts, never trust a person who doesn't like pizza, and always keep it rubber side down.

Thursday, January 29, 2015

I'll Be What I Am


The Unstupider, Revisited

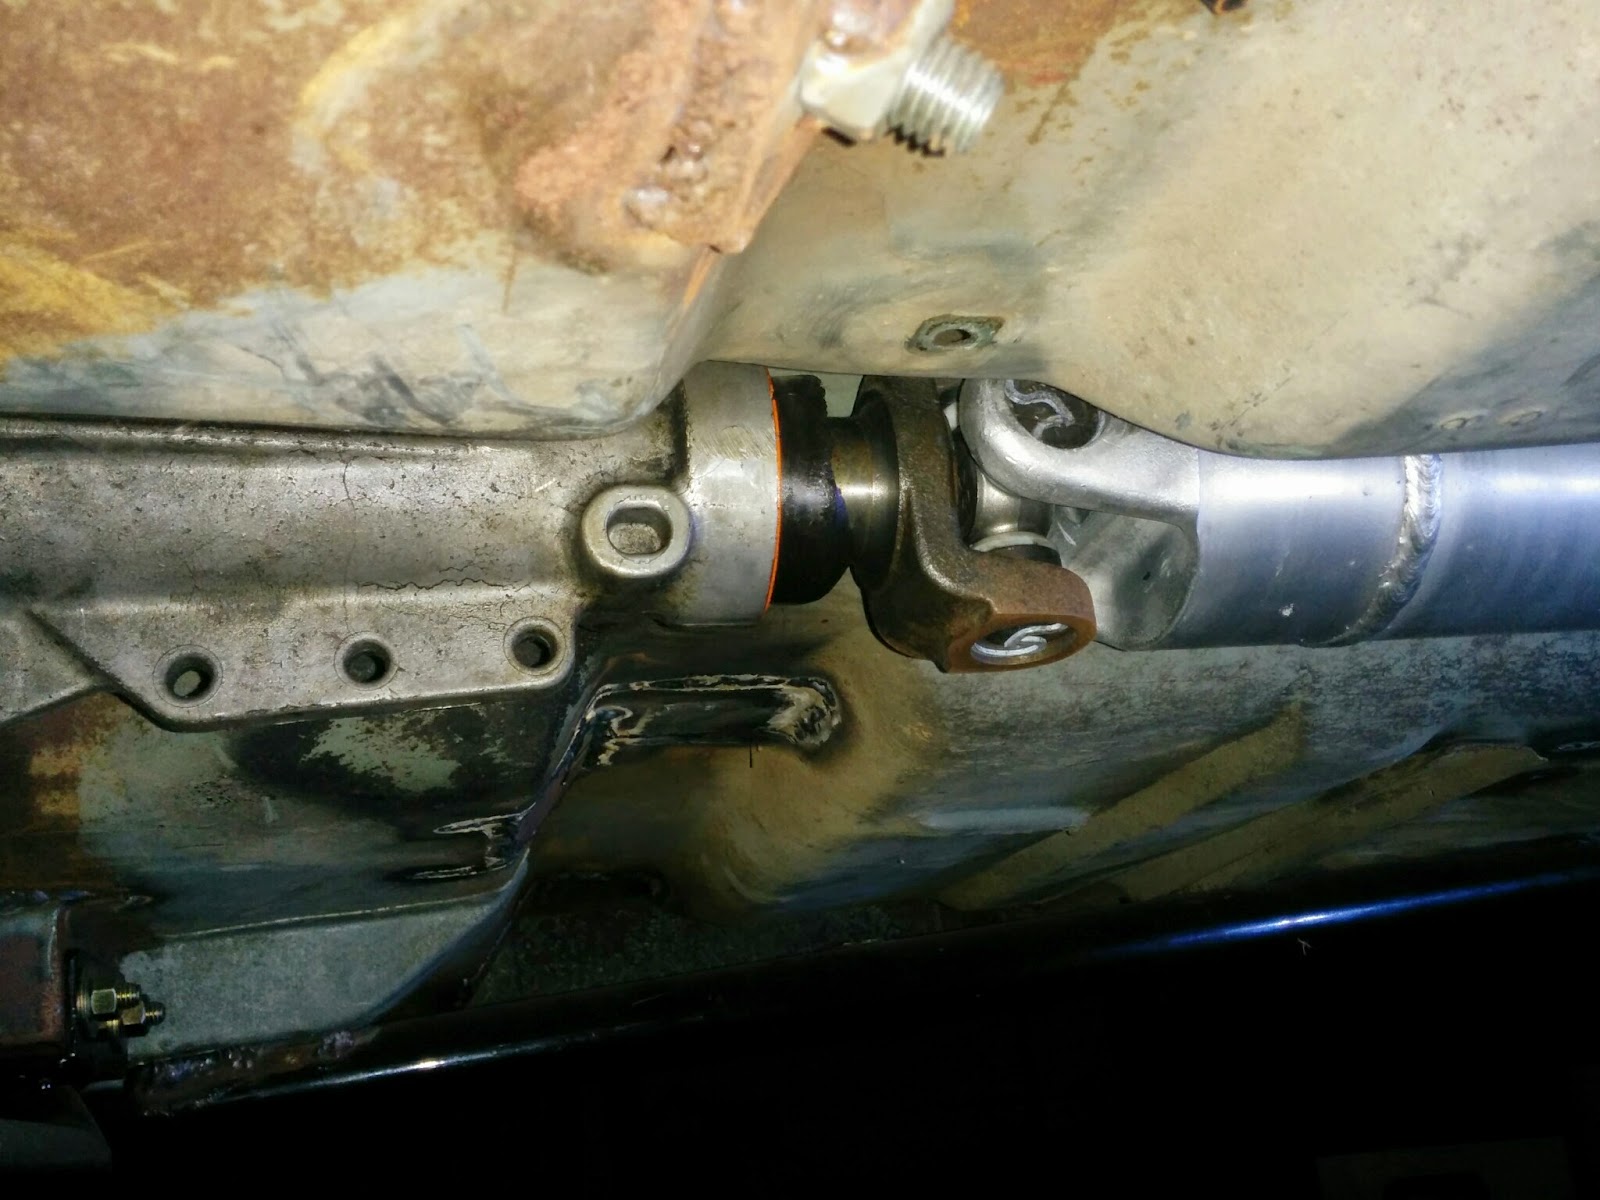
If you've been following along, you will remember that I'm an idiot. The reasons are legion, for they are many, but in this case I'm referring to the time when I measured wrong and had a driveshaft shortened about an inch too short. I then found a spacer for the driveshaft to take up the slack, but luck was not with me that day. The spacer, which I called the unstupider, did not fit my pinion flange since the Mustang 8.8 axle has a different pinon flange than the Explorer 8.8 pinion flange. After a lot of interneting I found that Fabtech makes a spacer for the F-150 and someone listed it as applicable for the Explorer as well. I rolled the dice and went to 4-Wheel Parts in Compton (yeah, that Compton, where you get shot while eating BBQ or doing drug deals) to get one. Turns out they didn't have one in stock so they would have to order it in and then ship it to me. So I went on my way, expecting to get a package on my doorstep in the next few weeks. That was in September. It is now almost February. To be honest I kind of forgot about it, and every time I remembered, I got angry that I had not yet received the Unstupider 2.0. So finally I called 4-Wheel Parts, ready to shoot someone (while eating BBQ) and they said "Uhhh, yeah we have that in stock. We don't know what happened. You can come pick it up."  So at lunchtime I had some hawiian BBQ and decided not to shoot anyone so long as they had my part. When I showed up it was on the front desk. They smelled the BBQ on my breath, cowered a bit, and handed me my part. When I finally made it home that night around 10:45, I climbed under the car to check if it fit. Fortune was not just with the weaklings at the counter of 4-Wheel Parts, but it was with me as well because the Unstupider 2.0 fit. Fate had smiled upon me.


Before spacer installation
Problem: solved

Intermission


Mild Steel or Spicy?

After spending months working on my intake manifold which may or may not work because welding aluminum is a pain in the arse, I finally switched my welder back over to steel. That right there is reason to rejoice. I got back to what I was working on when before the manifold, namely seat brackets. When I first installed the Miata seats I just kinda stuck them in and welded a reinforcement plate and nut on the underside of the floor pan. I still had not finished the rear mounts. I decided to redo the whole thing and redo it right. These seat brackets are incredibly solid and would hold the likes of Rosie O'Donnel if she could fit through the door.

Patching up the old mess I made
Reinforcement plate
Bracket tacked in place
The "Equal Opportunity Seat Bracket". Welcome to my car, fatties! 
Passenger side finished

What's Fresher than being Fresh??

In closing, I just want to share something different with you. This is the two year anniversary of me finding Grace on the Inland Empire Craigslist (the finest in all the land, for real though). Two years ago I was in Timmins, Ontario, Canada, and tonight I am in that same blessed frozen wasteland. I found Grace while browsing craigslist between cold start tests on a prototype of what is now the Lexus NX200t. It was also the first time I had ever used a bidet, and most certainly the first time I had ever used a computer controlled toilet seat. So in memoriam, here is the control panel of that computer controlled, heated, amazing toilet seat/bidet combo. May you, dear reader, some day be fortunate enough to experience such goodness.